Automatic Cloud Backup
Off-site redundant backup is the last line of defense against extreme risks. NodeAuth supports multi-channel automatic synchronization, ensuring your 2FA assets can be recovered with one click in any situation.
📧 Configure SMTP Email (Most Universal)
This is the most common off-site backup method. You can automatically send encrypted backup packages to your work or private email.
- SMTP Server: e.g.,
smtp.gmail.comorsmtp.qq.com. - Port: Usually
465(SSL) or587(TLS). - Account & App Password: Enter your email address and third-party app authorization code (note: this is not your login password).
- Recipient: It is recommended to set this to your most commonly used backup email.
🤖 Configure Telegram Backup (Most Convenient)
The Telegram Bot-based backup method is both real-time and visually intuitive:
- Contact @BotFather to create a bot and get a
Bot Token. - Send a message to your new bot from the Telegram account you want to receive backups on (Important).
- Get your personal
Chat IDvia @userinfobot. - Enter these two items in the NodeAuth settings.
- Advantages: You can send encrypted backup packages to Telegram at any time via the bot, essentially having a private off-site backup library at your fingertips.
🪣 Configure S3 / R2 Cloud Storage (Geek's Choice)
- Endpoint: Your S3 endpoint (e.g.,
https://xxx.r2.cloudflarestorage.com). - Bucket: Storage bucket name.
- Access Key / Secret Key: API access credentials.
- Region: Enter the corresponding region (e.g.,
auto).
🐙 Configure GitHub (Version Control Aficionados)
Utilize a private GitHub repository to save encrypted backup data, supporting full version control history (Git-based).
- Create a Private Repository to store backups on GitHub (e.g.,
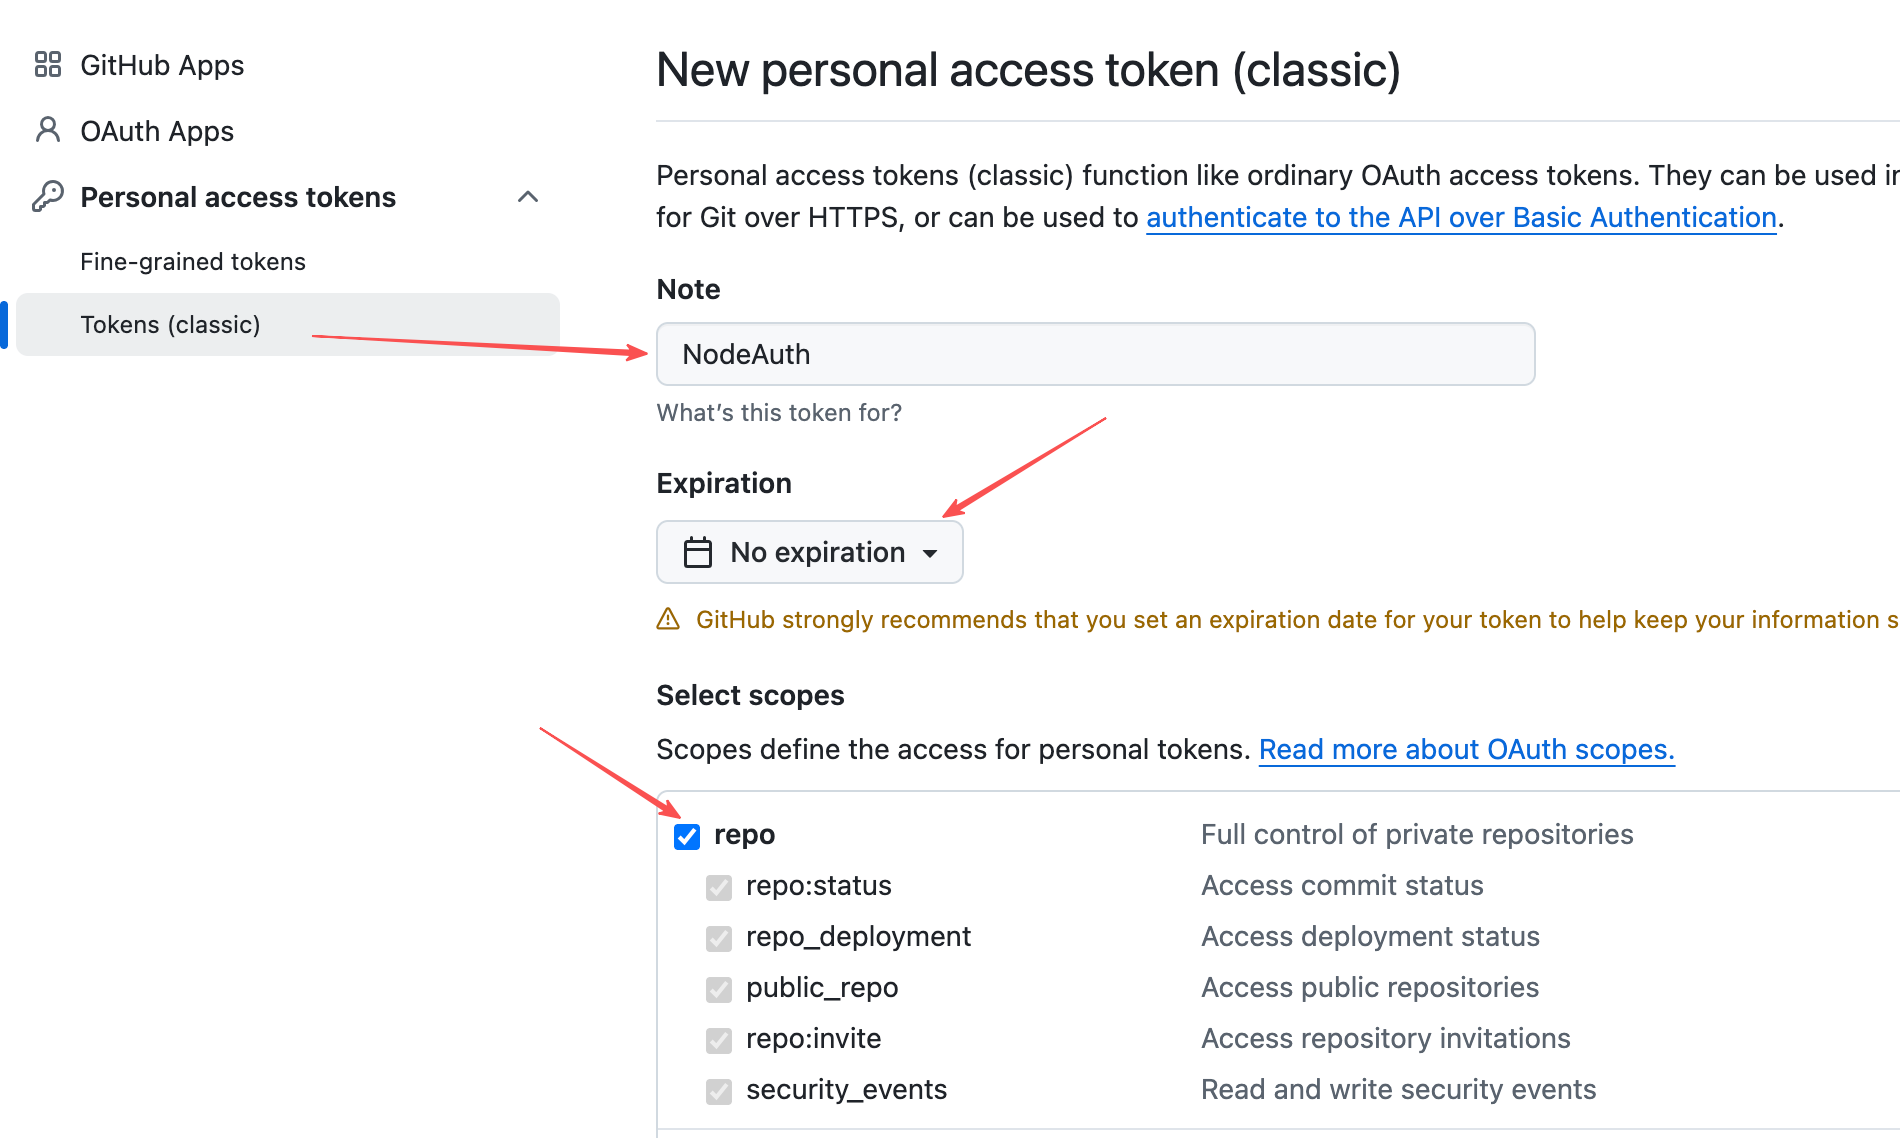
nodeauth-backup). - Go to Settings -> Developer settings -> Personal access tokens -> Tokens (classic).
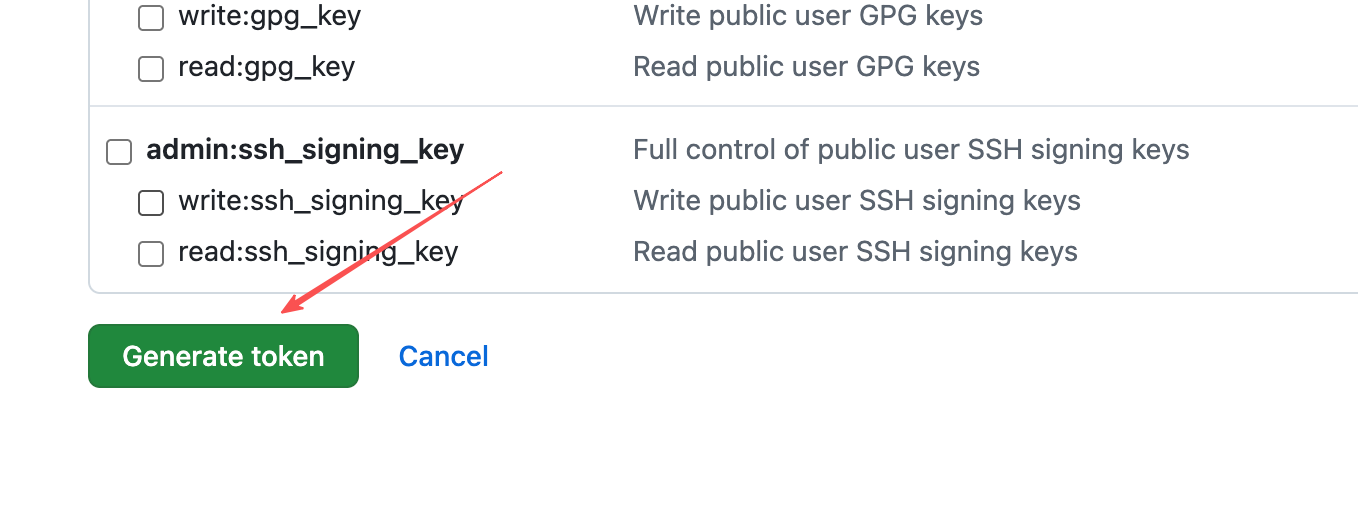
- Click "Generate new token (classic)", set an appropriate expiration, and strictly check the
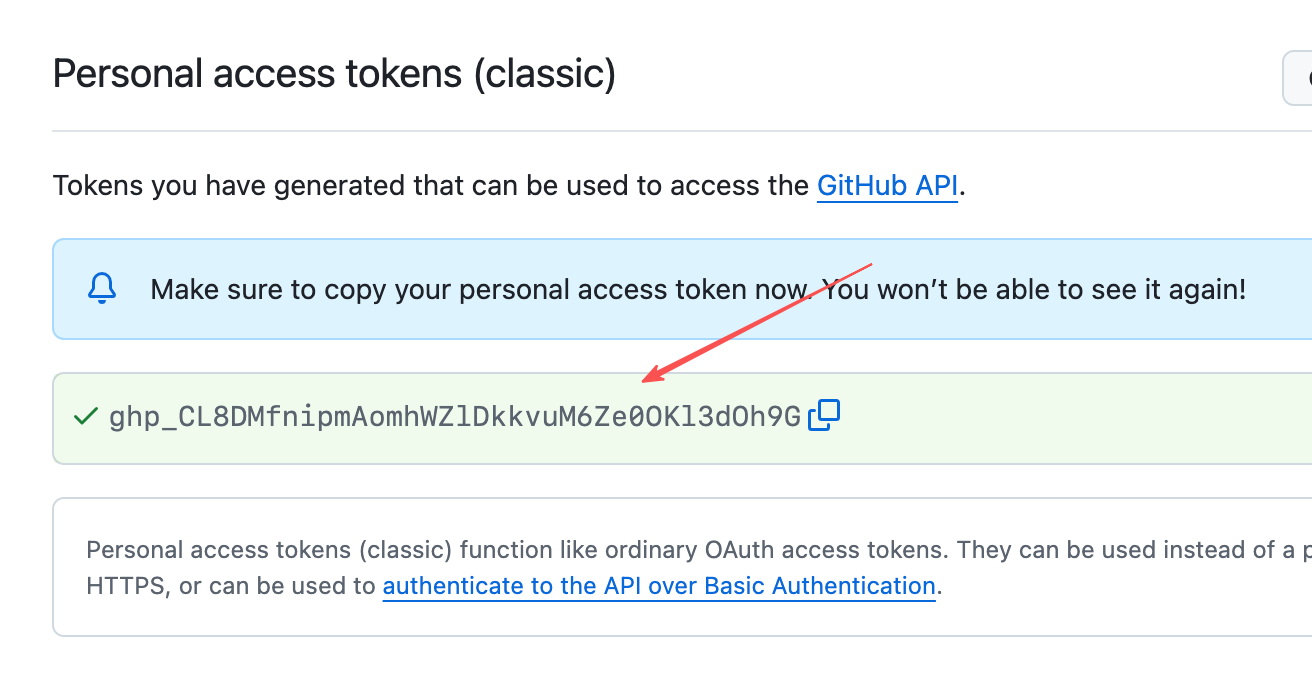
reposcope (gives full control of private repositories). - Save and copy the generated Personal Access Token.
Click to view: Steps to get Personal Access Token
- In NodeAuth, fill in respectively:
- Personal Access Token (the key you just copied)
- Repository Owner (your GitHub username)
- Repository Name (the newly created private repo name)
- Branch Name (e.g.,
mainormaster) - Save Directory (the path to store in the cloud, e.g.,
/)
☁️ Configure WebDAV (Private Cloud Users)
Suitable for Synology, QNAP, Nutstore, or Alist users:
- URL: Your WebDAV mount point address.
- Directory: Specify the storage folder (e.g.,
/backup/nodeauth/). - Authentication: Enter your WebDAV account and password.
🔼 Configure Google Drive
Private Storage: Uses
appDataFolderisolation by default.Low Latency: Synchronizes extremely fast thanks to Cloudflare's global backbone network.
🛠️ Configuration Guide:
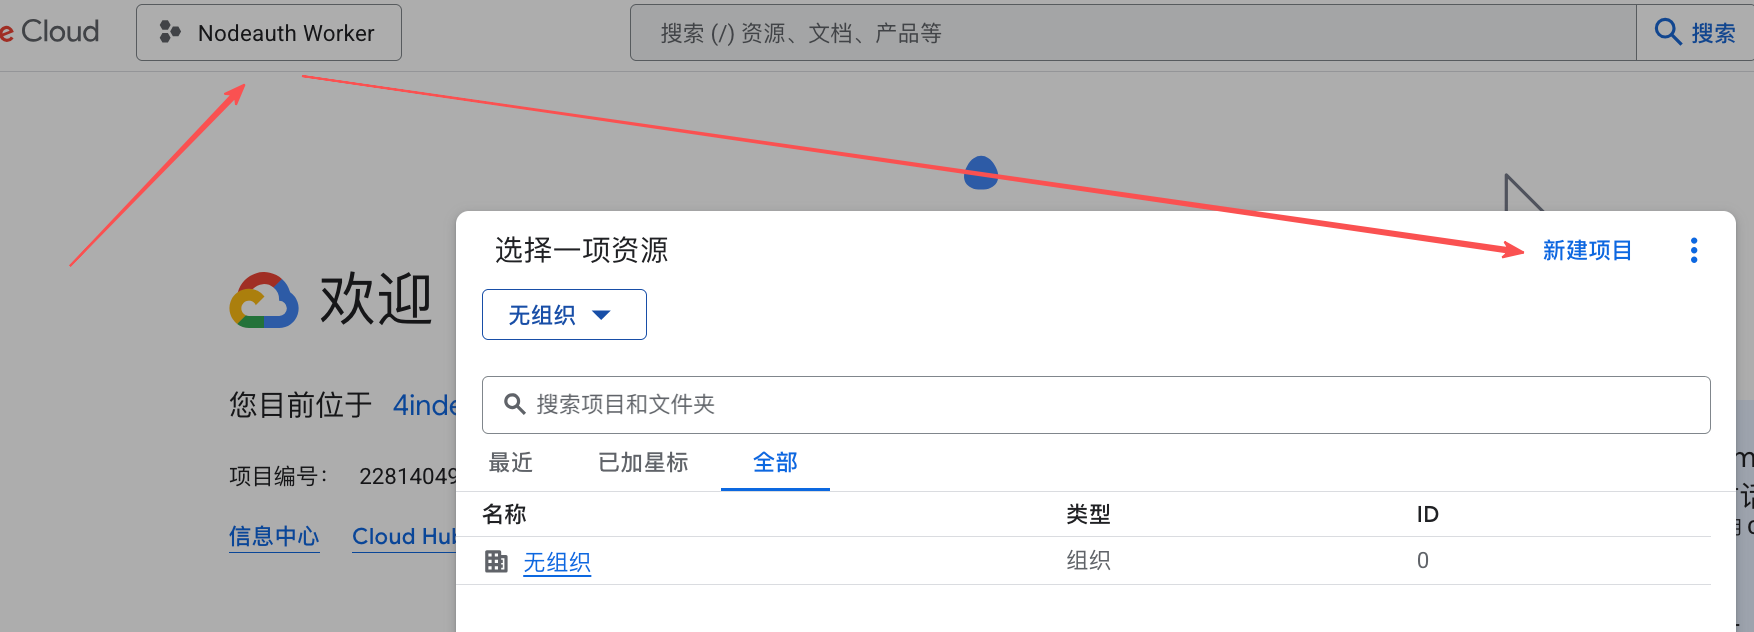
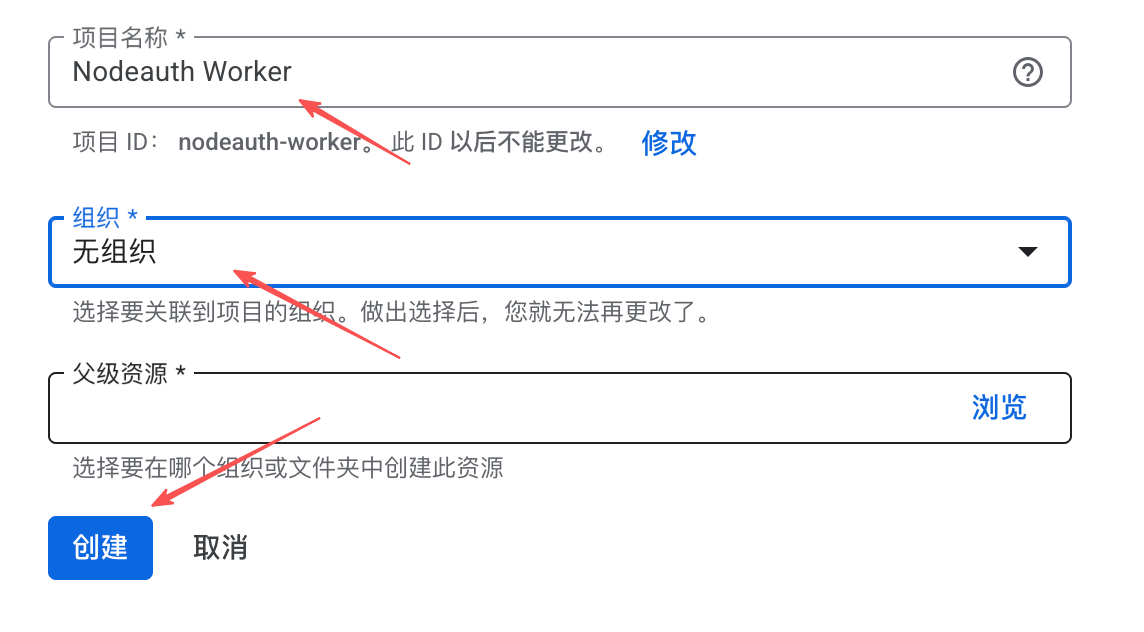
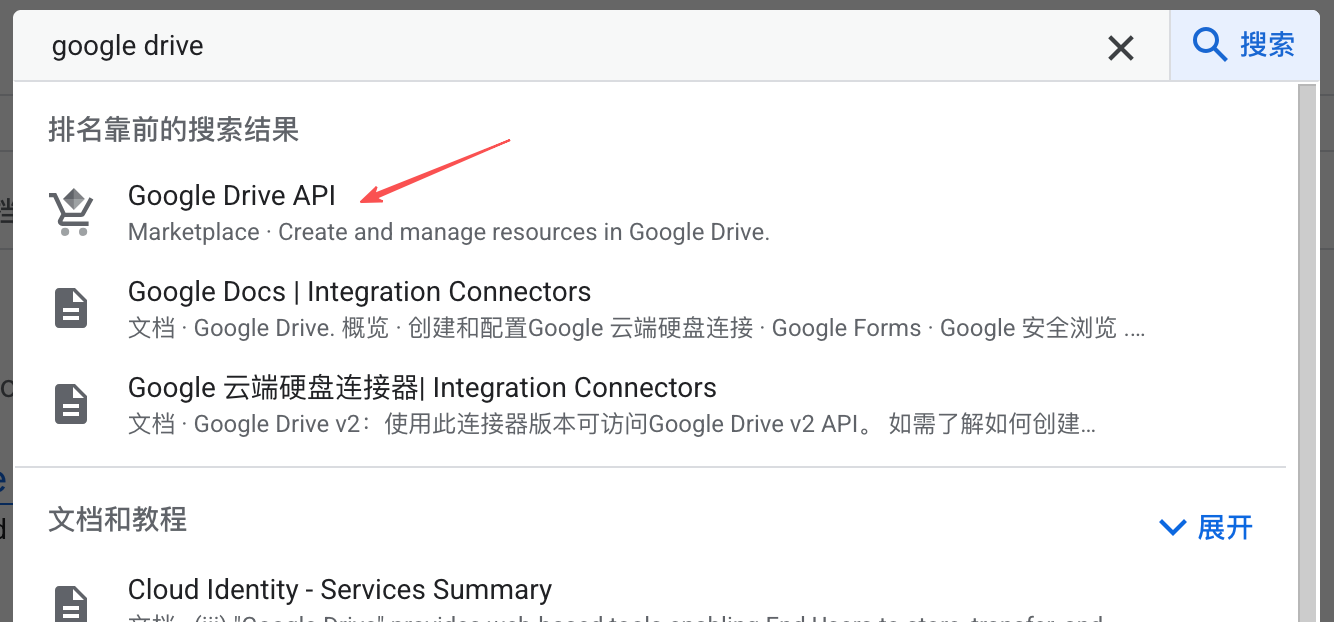
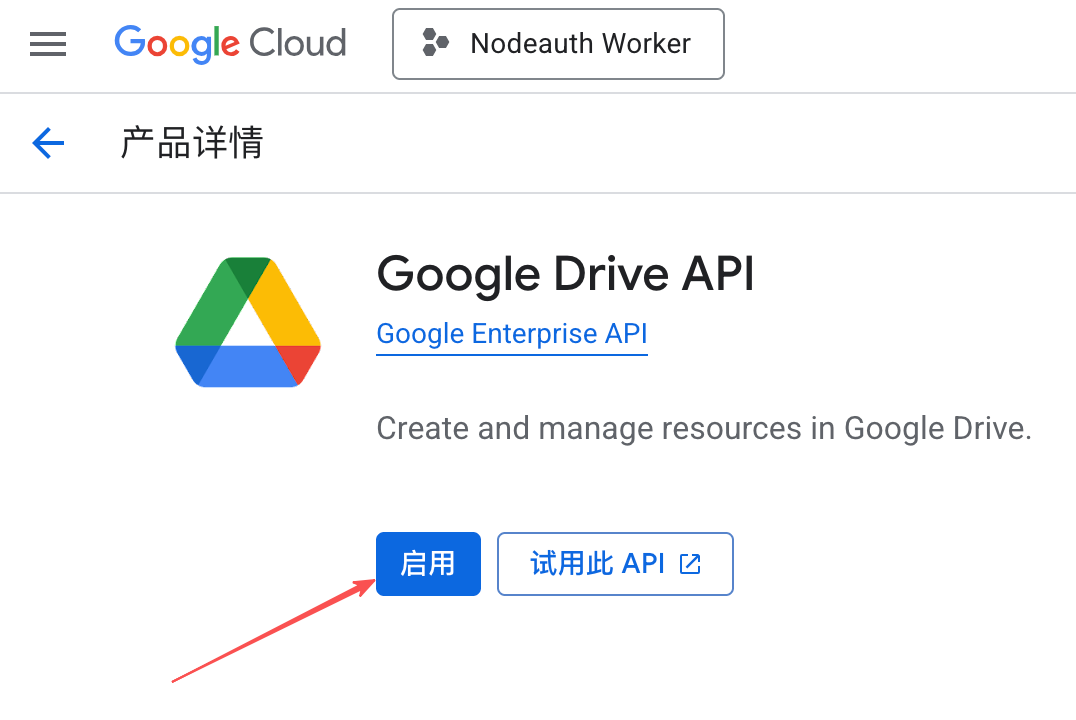
- Visit Google Cloud Console to create a project and enable the
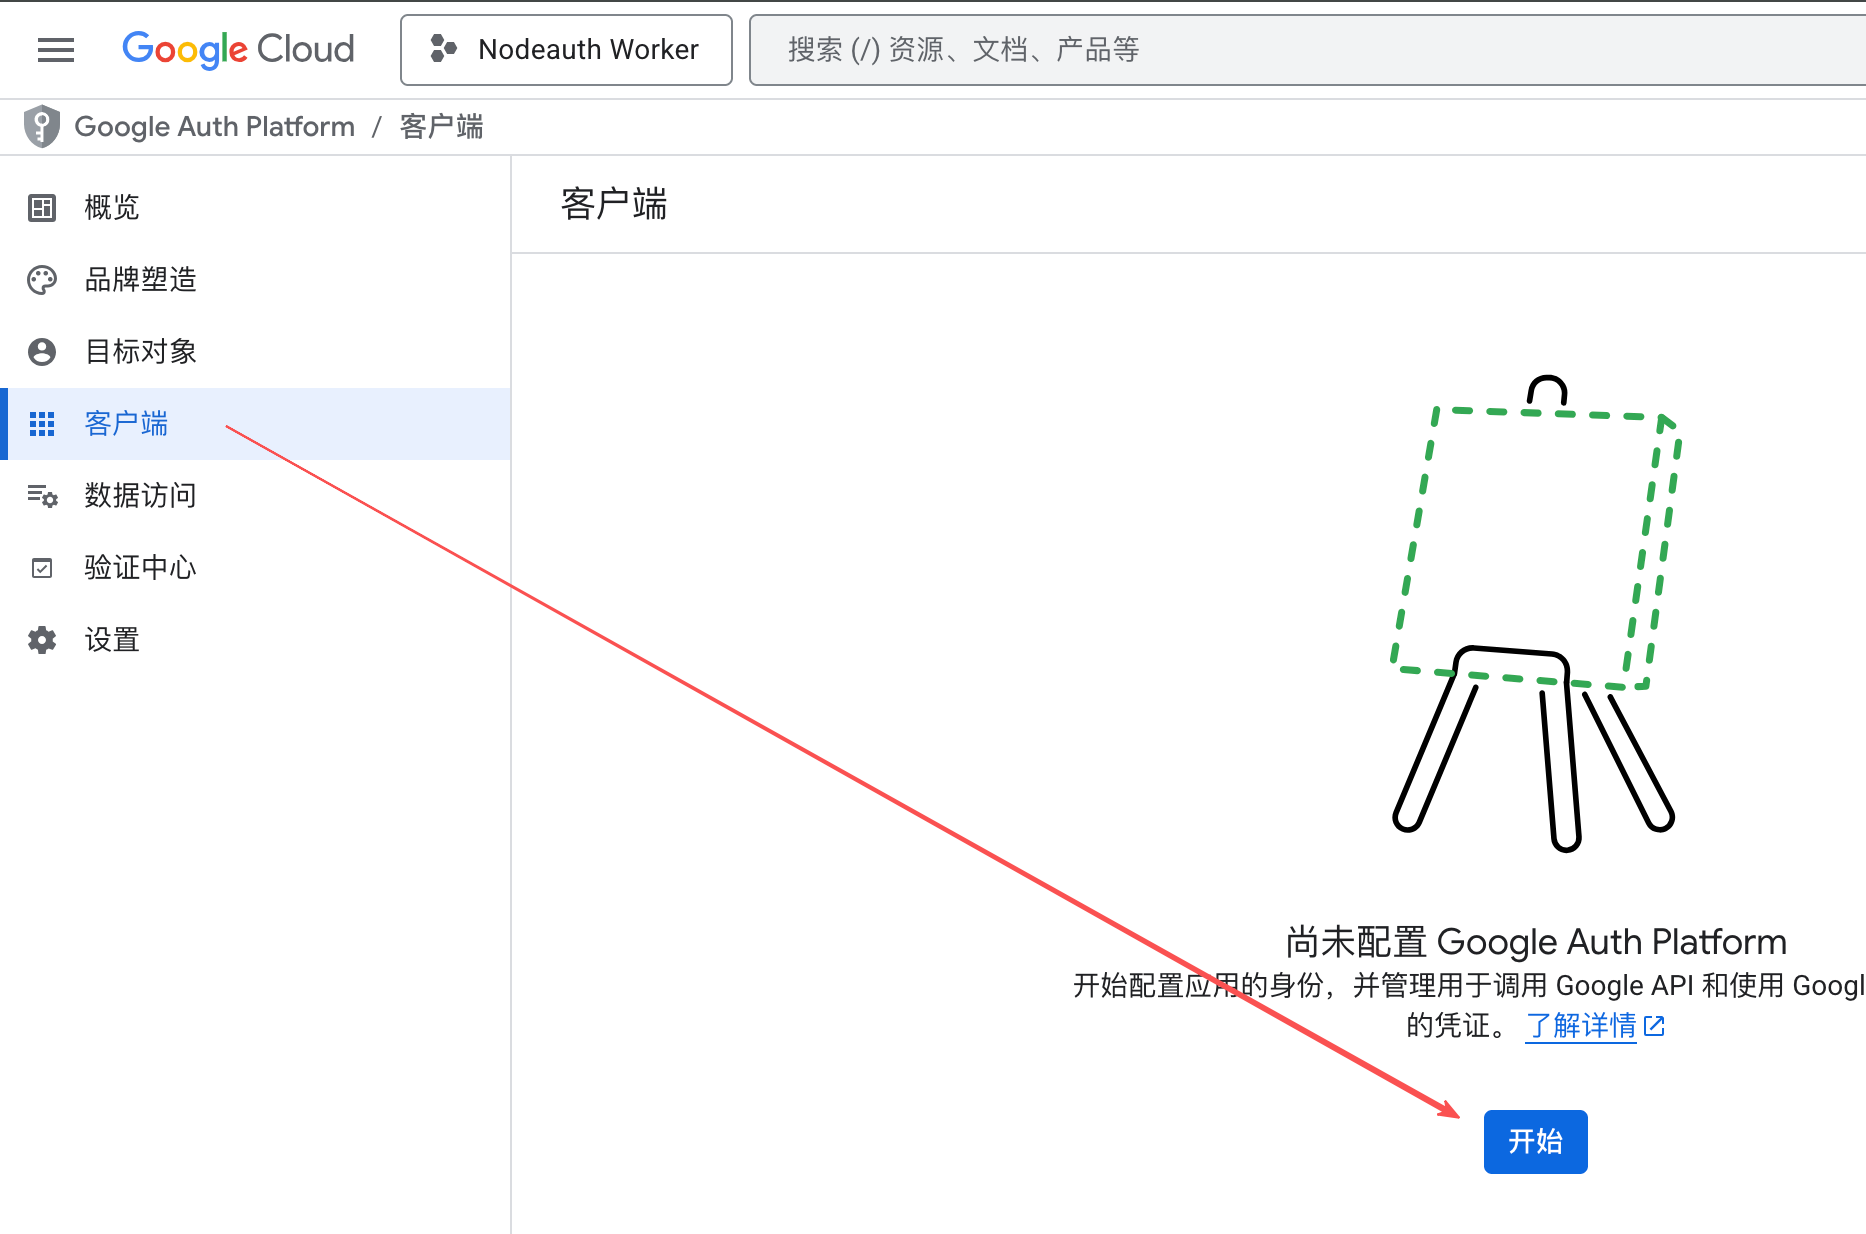
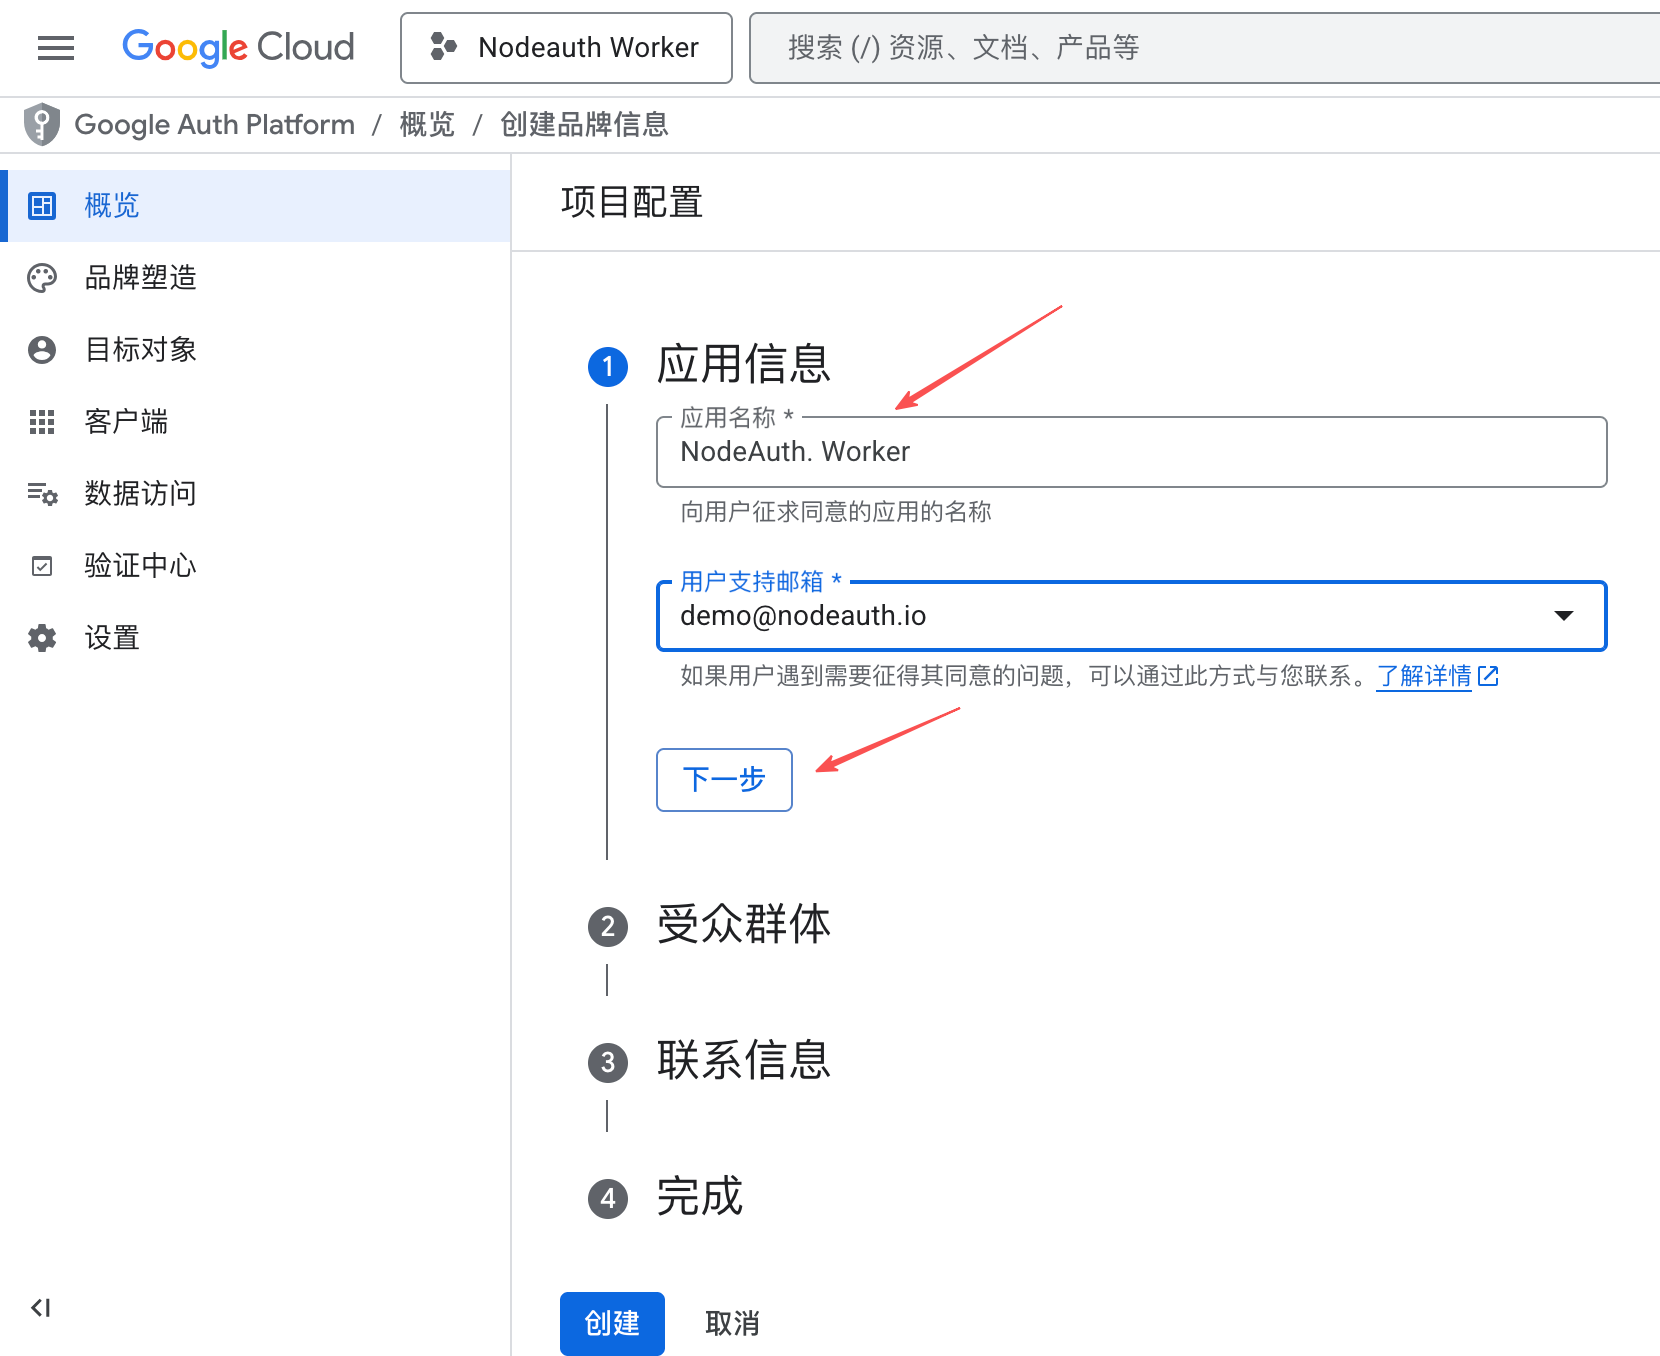
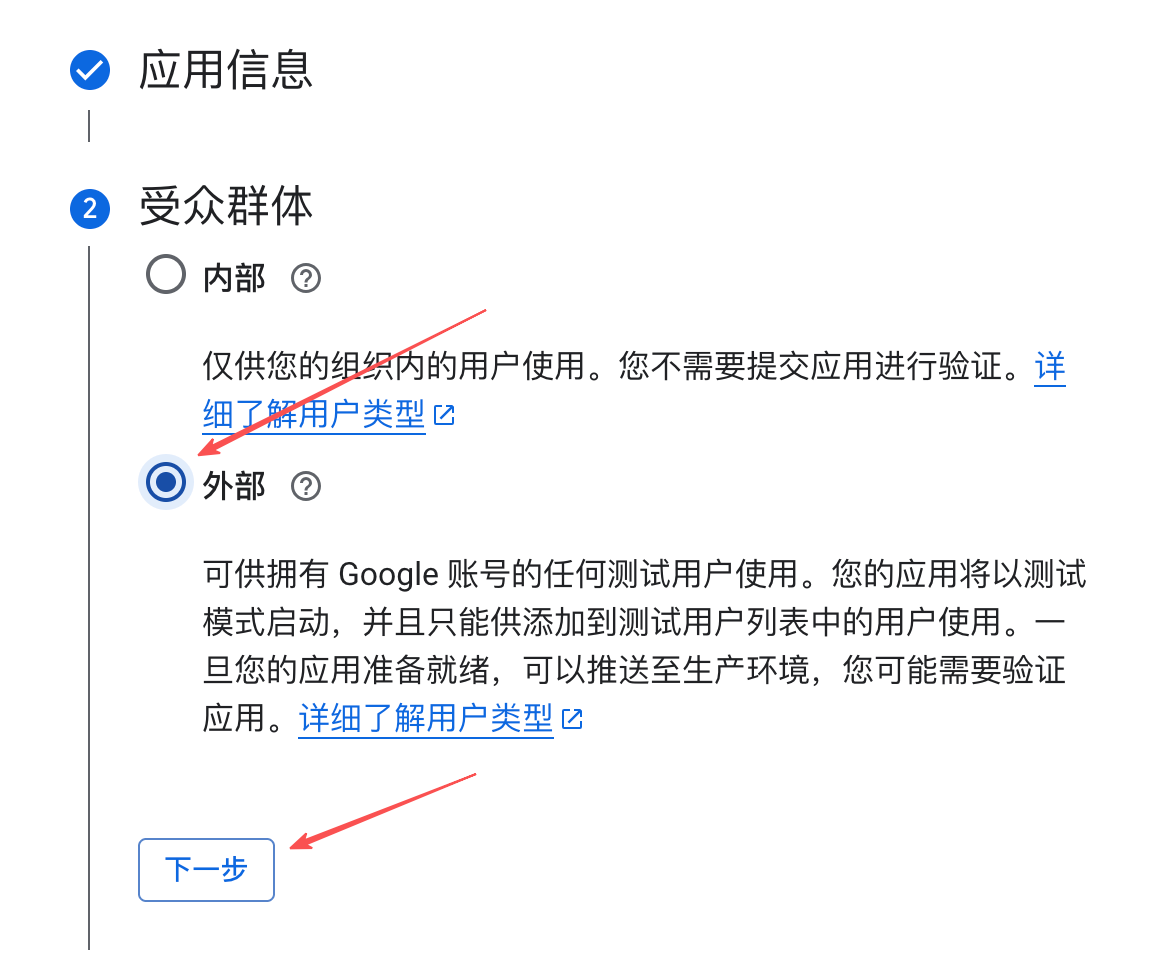
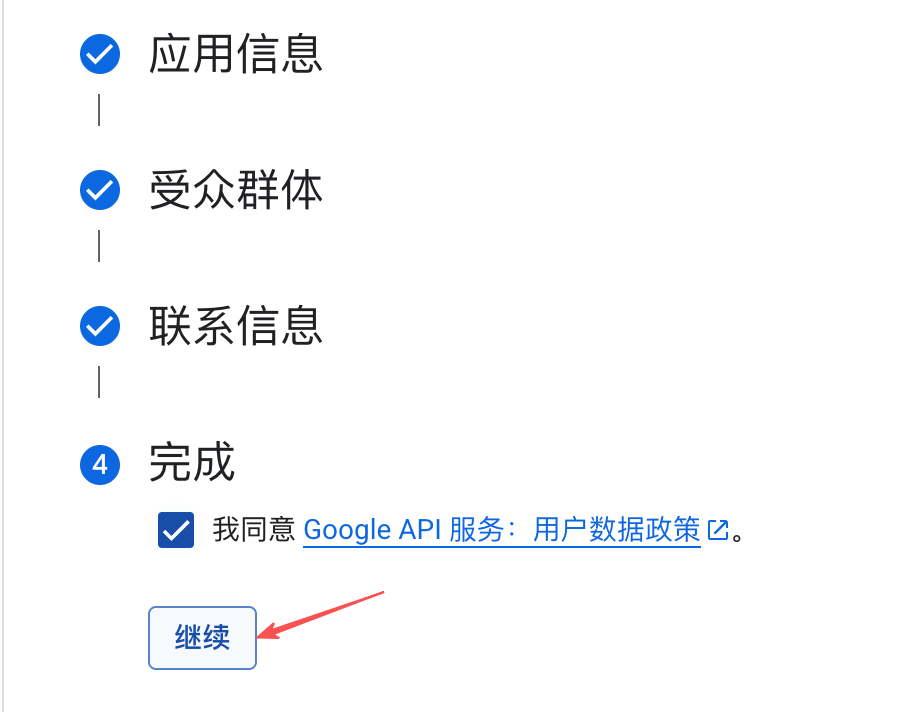
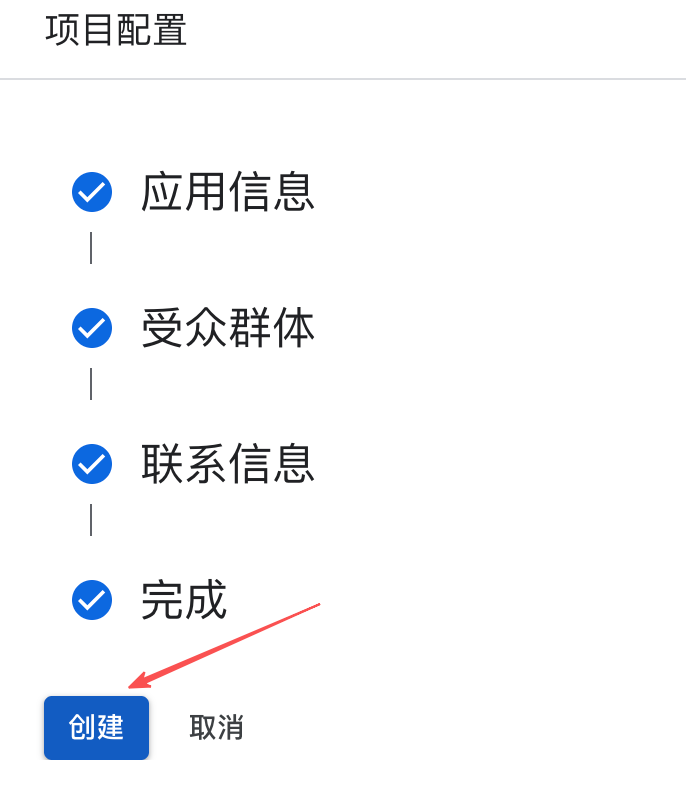
Google Drive API. - Create "OAuth consent screen" (Brand information) and enter information as required.
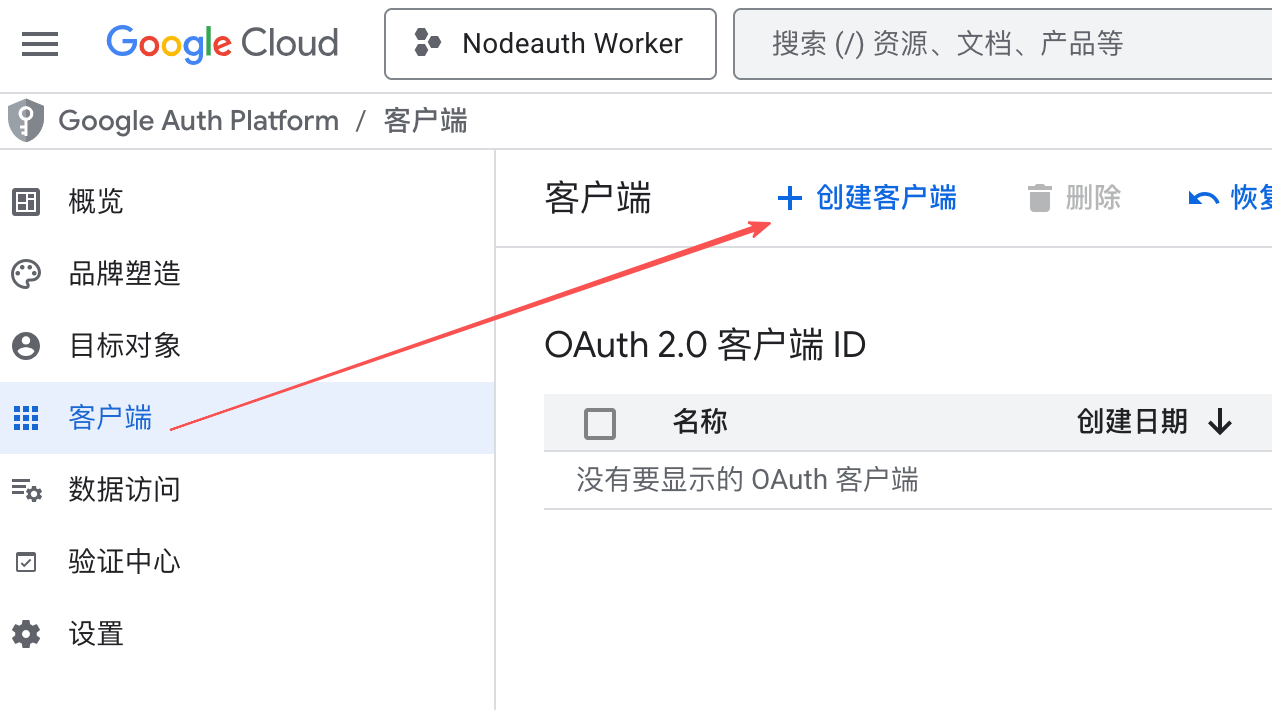
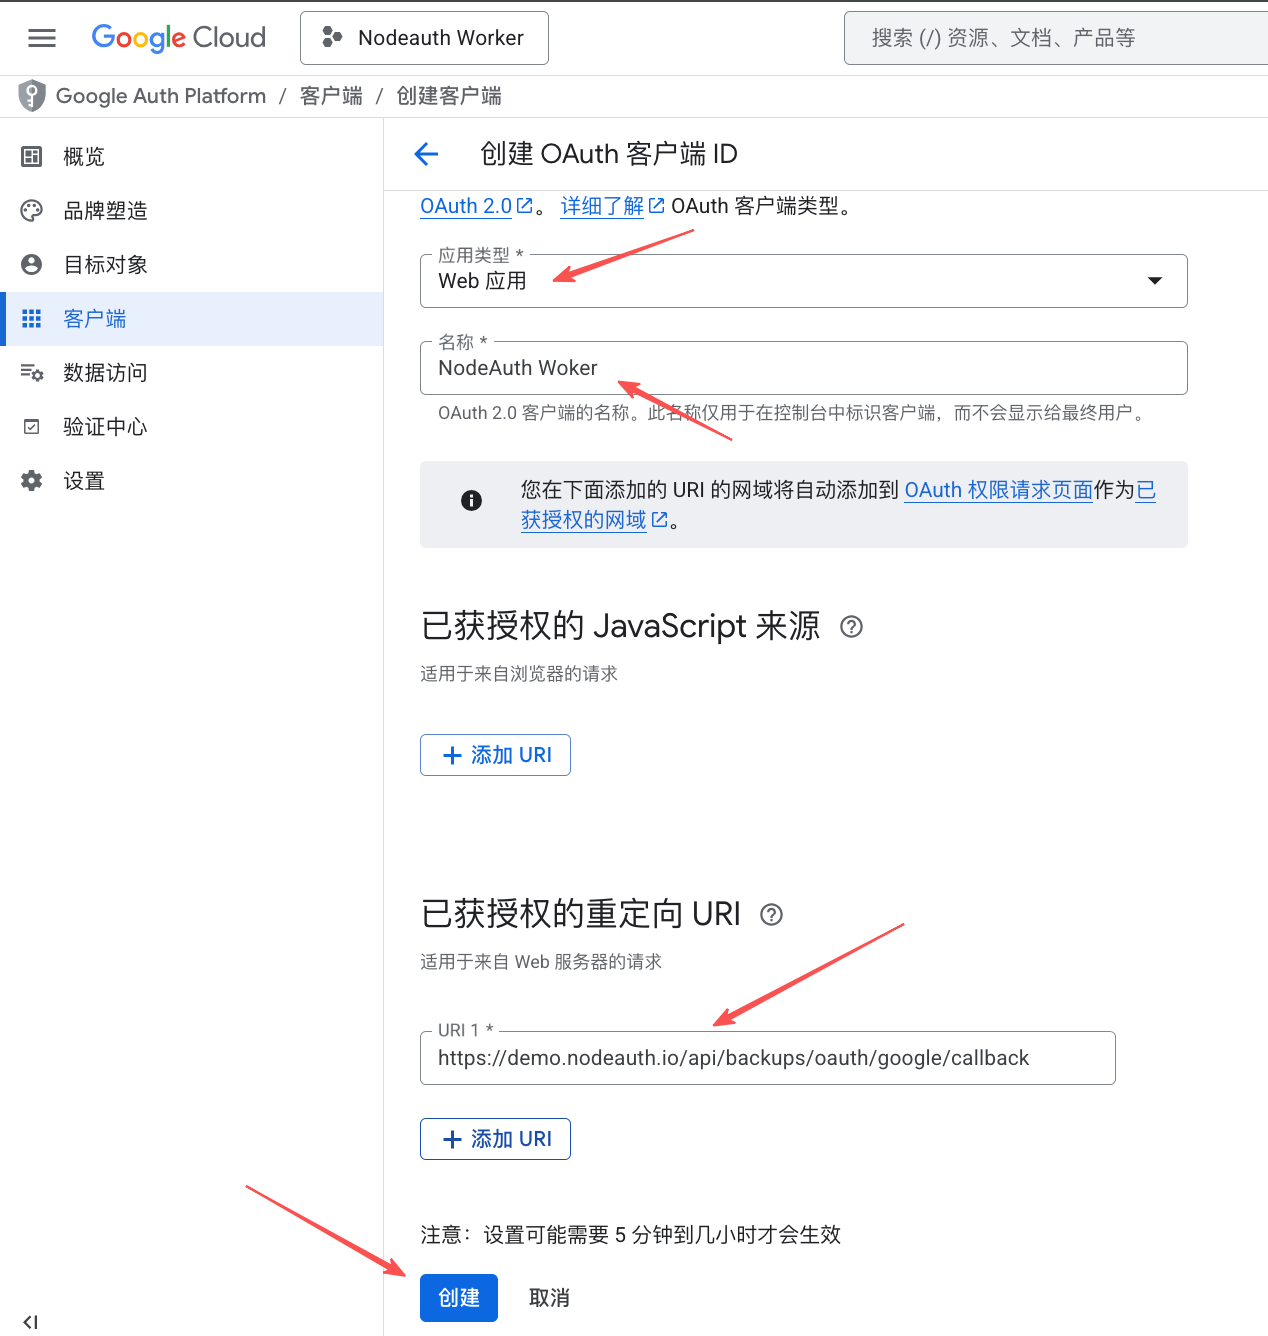
- Create "OAuth 2.0 Client ID" (Web application) and set the redirect URI:
https://your-domain.com/api/backups/oauth/google/callback. - Get your
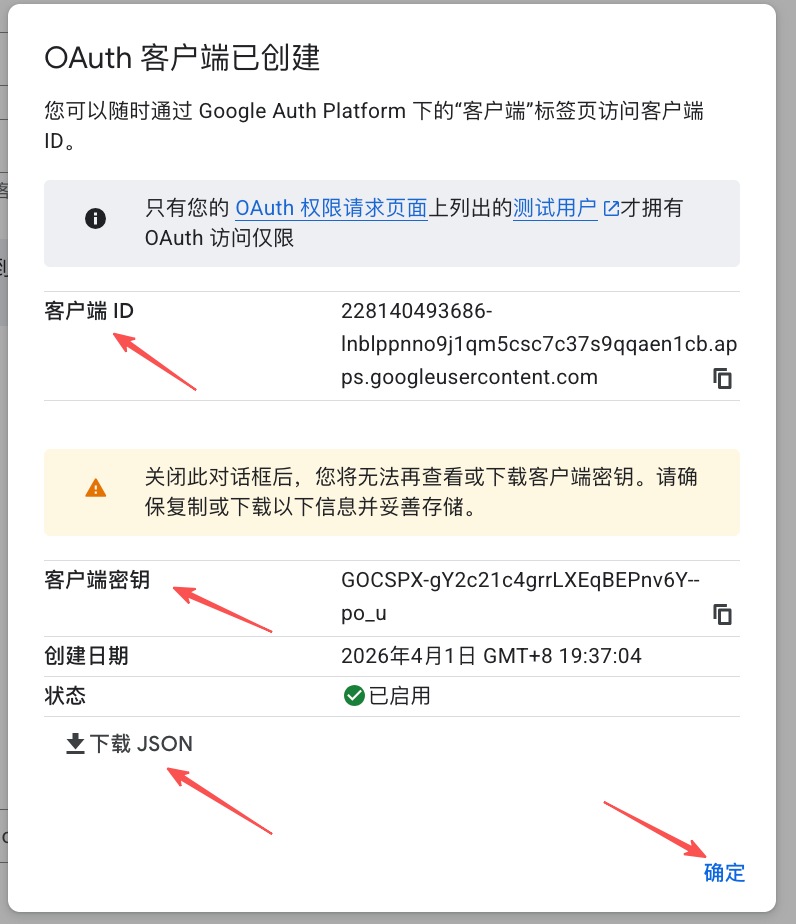
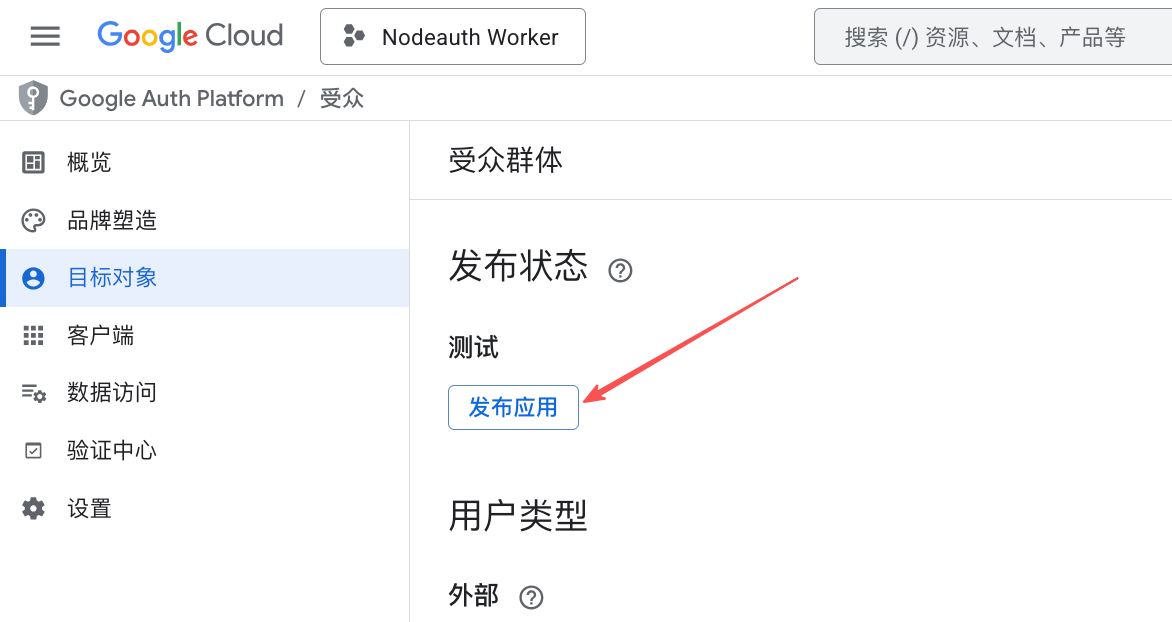
Client IDandClient Secret. - In "OAuth consent screen" -> "Publish App".
- Configure Environment Variables: Fill them into your deployment platform's "Environment Variables" or "Secrets" (refer to the Env Guide for details):
OAUTH_GOOGLE_CLIENT_IDOAUTH_GOOGLE_CLIENT_SECRETOAUTH_GOOGLE_BACKUP_REDIRECT_URI:https://your-domain.com/api/backups/oauth/google/callback
Click to view: Detailed configuration steps with screenshots


- Visit Google Cloud Console to create a project and enable the
🔼 Configure Microsoft OneDrive
High Stability: Uses Microsoft Graph API chunked uploading, supporting large capacity backups.
🛠️ Configuration Guide:
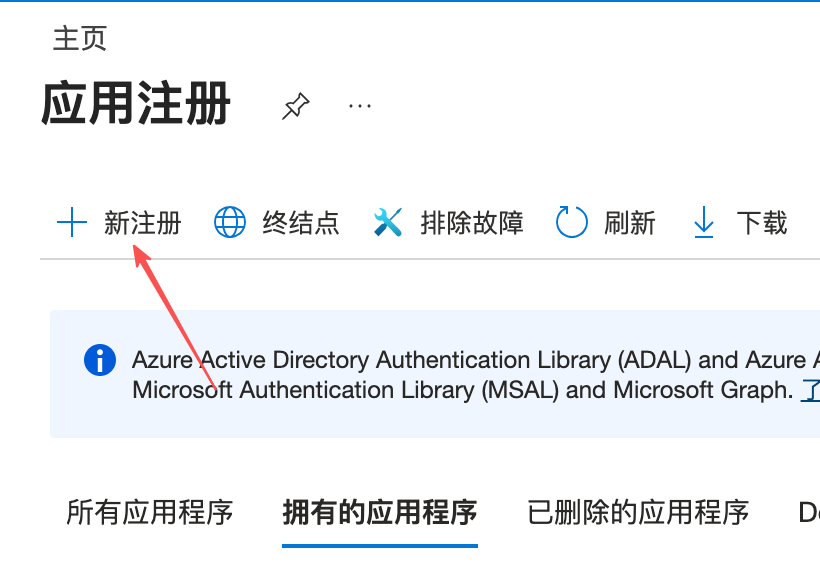
- Visit Azure App Registration to register an app (Note: Personal accounts are not supported; requires M365 Developer Program or Azure).
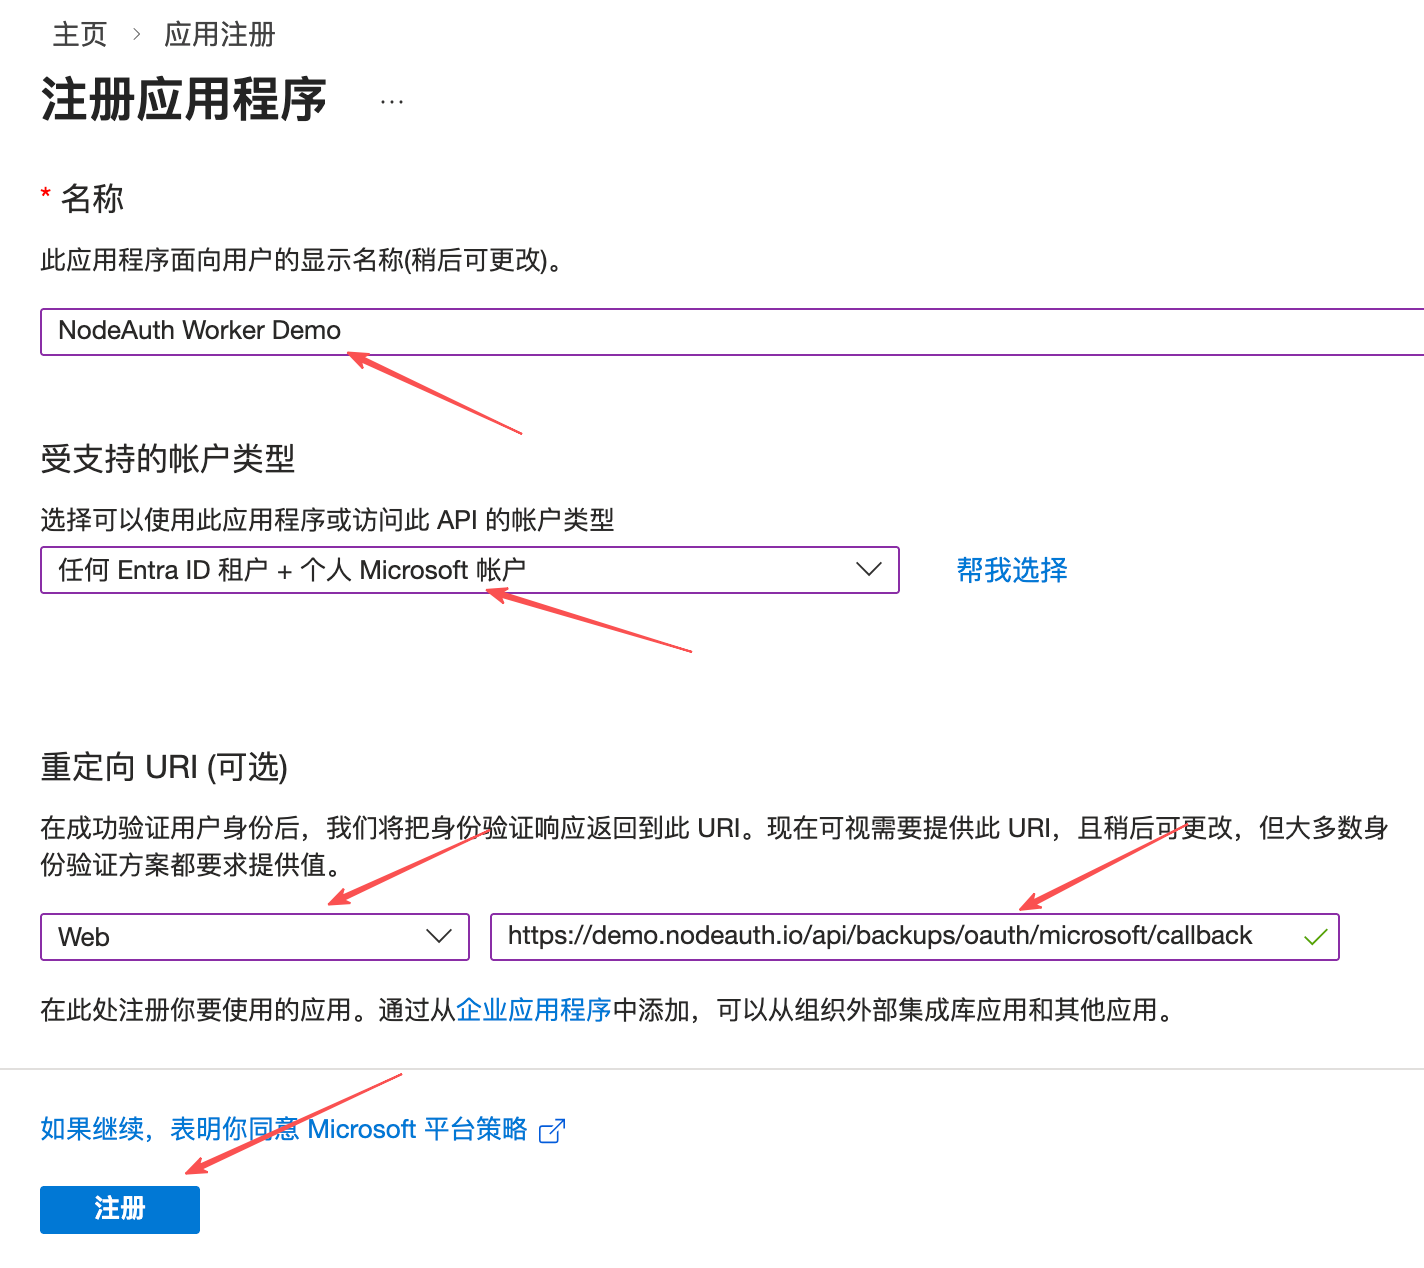
- Select Web for "Redirect URI" and enter:
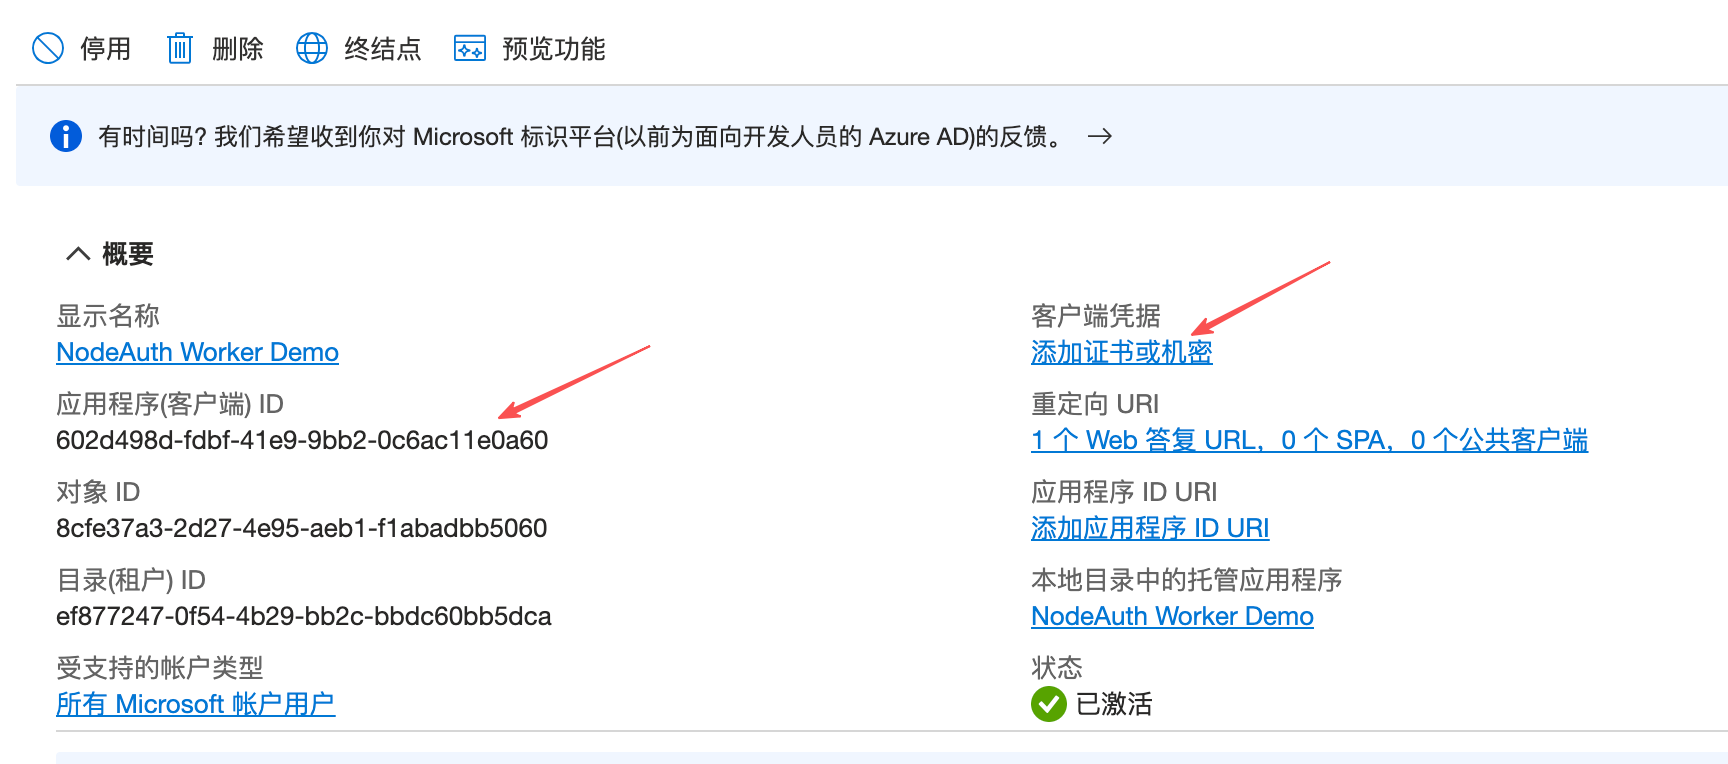
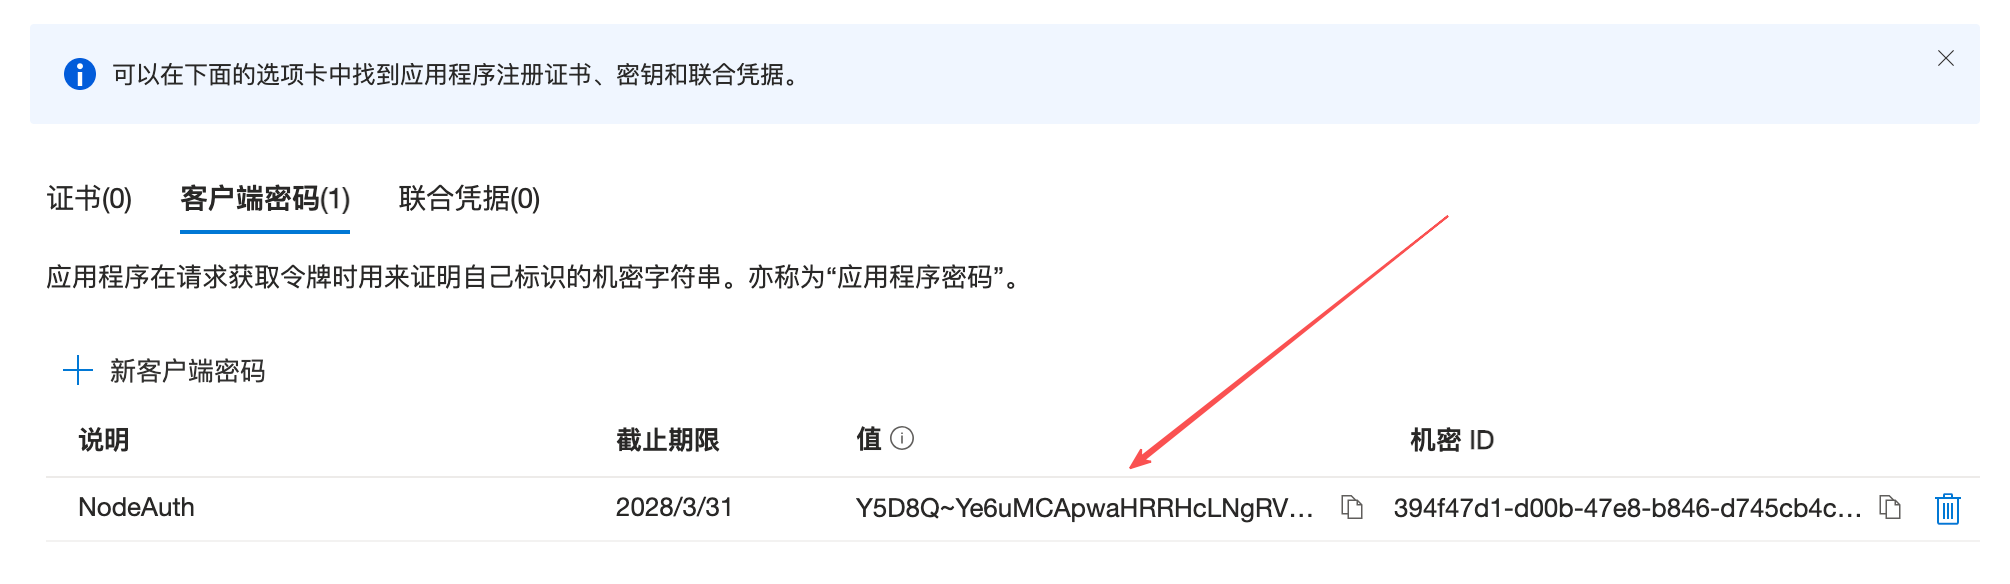
https://your-domain.com/api/backups/oauth/microsoft/callback. - Get your
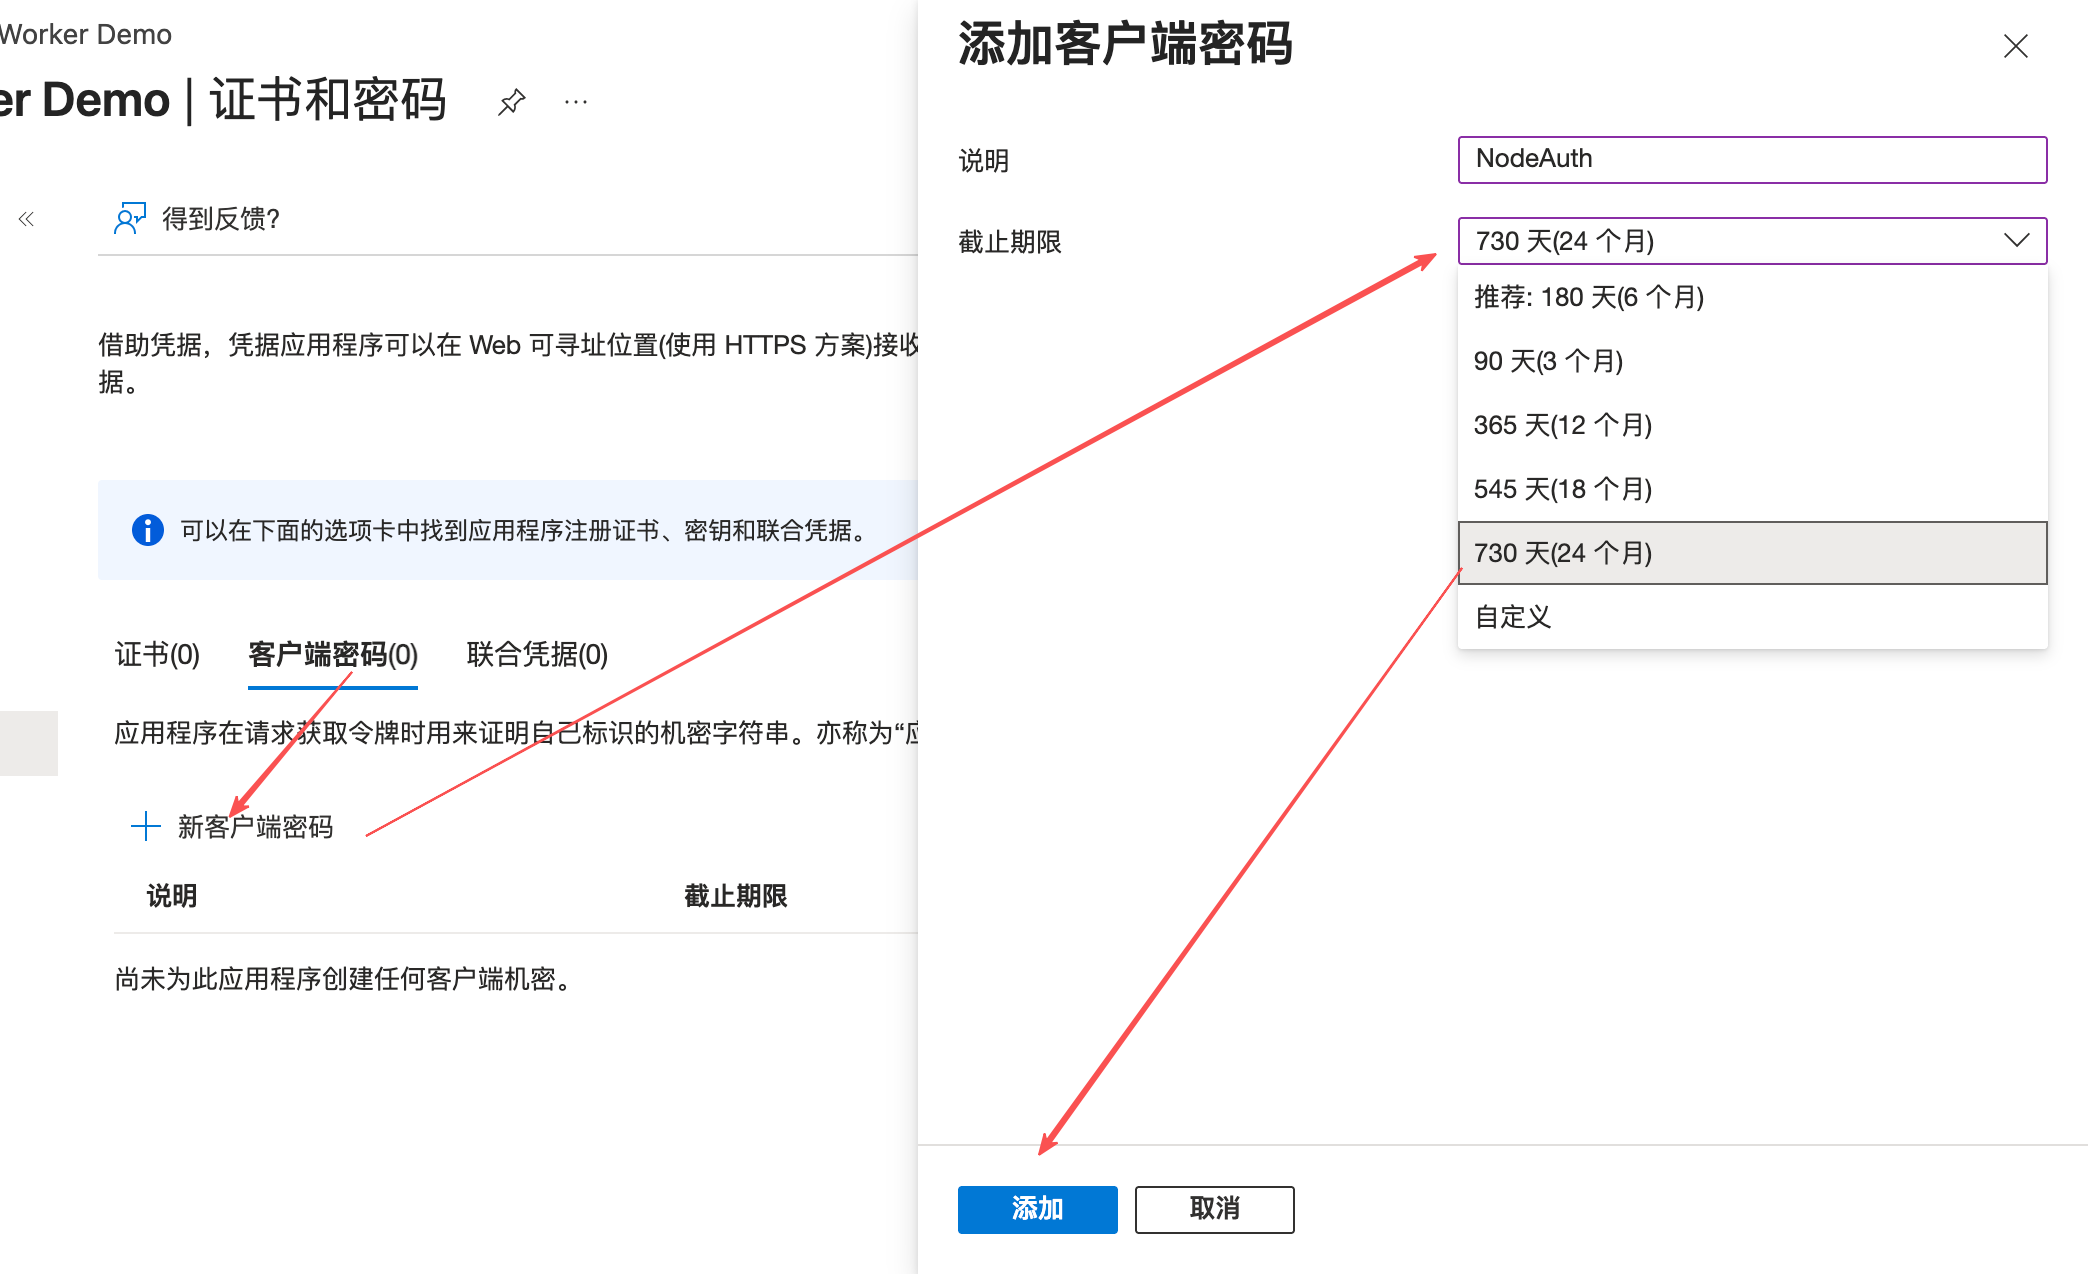
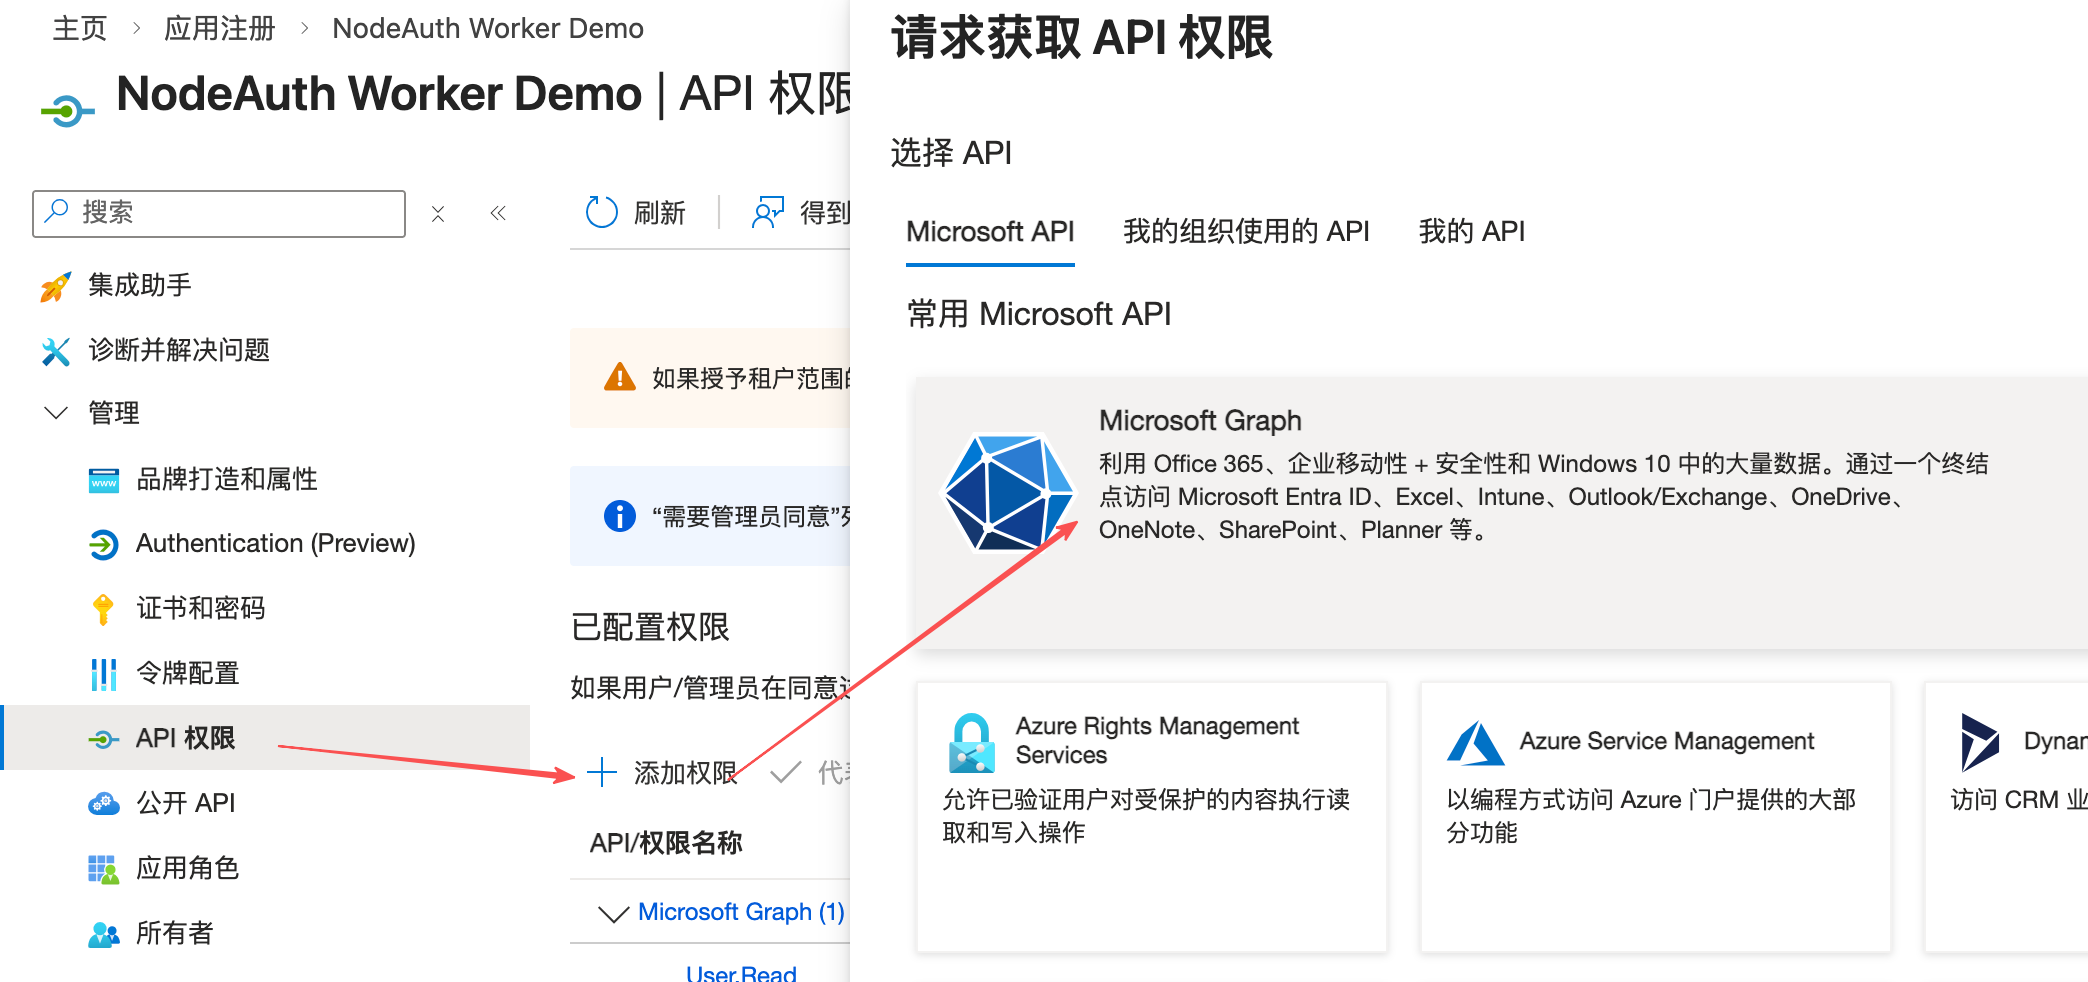
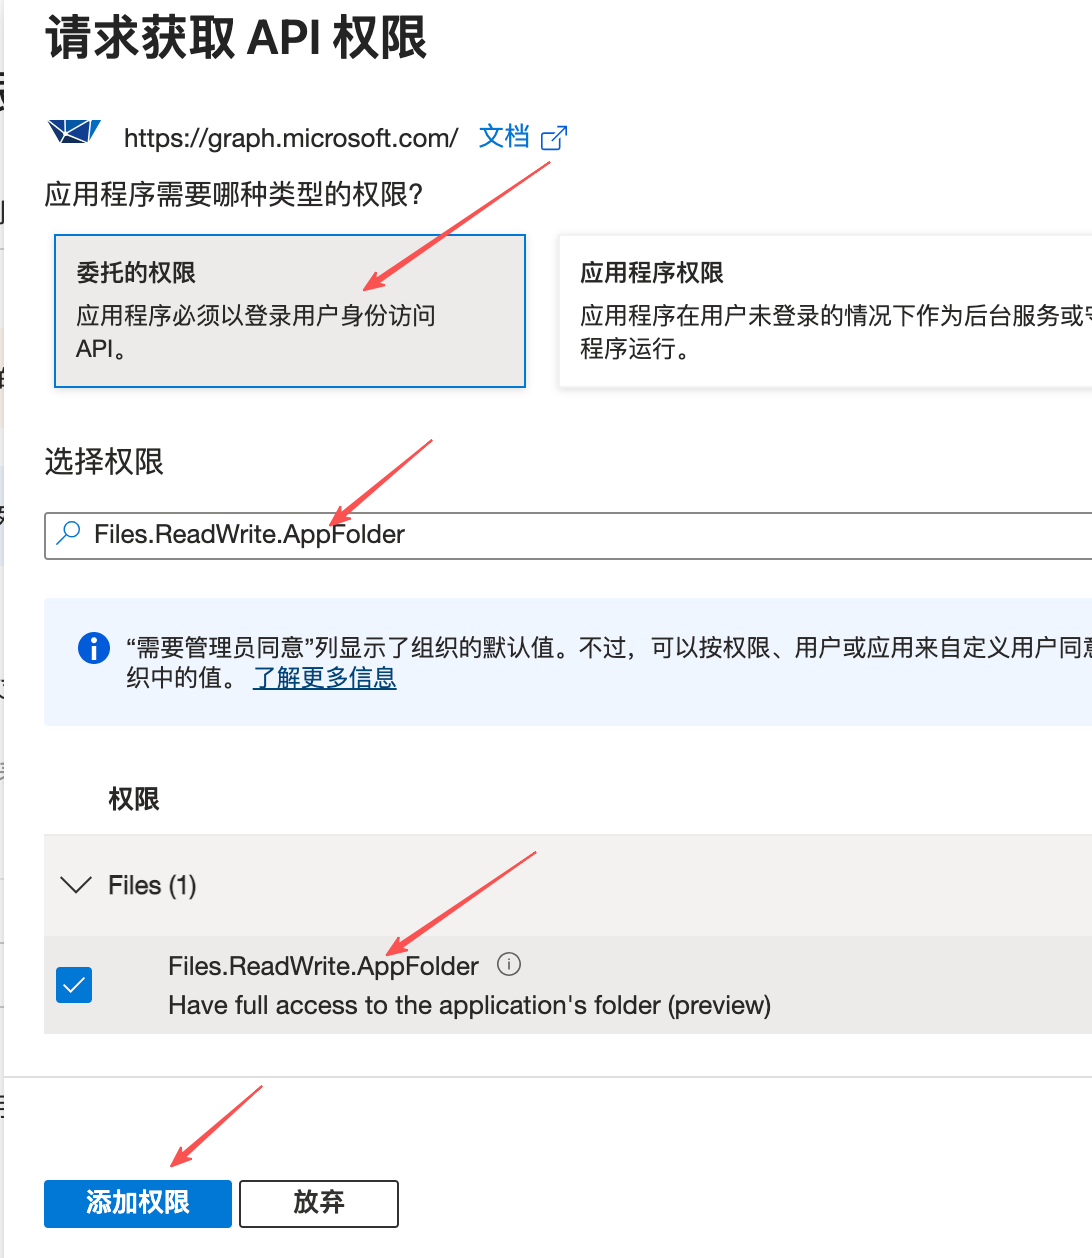
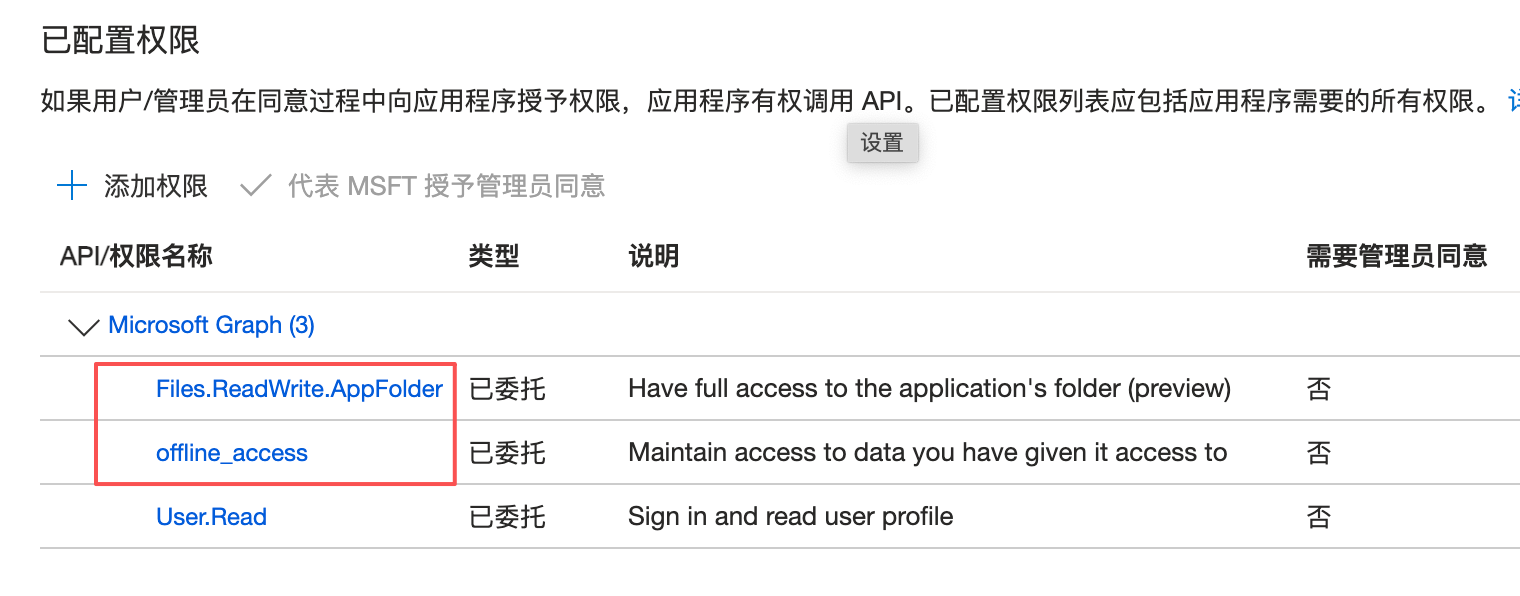
Client Secret. - Add "API Permissions"
Files.ReadWrite.AppFolderandoffline_accessand grant consent. - Configure Environment Variables: Fill them into your deployment platform's "Environment Variables" or "Secrets" (refer to the Env Guide for details):
OAUTH_MICROSOFT_CLIENT_IDOAUTH_MICROSOFT_CLIENT_SECRETOAUTH_MICROSOFT_BACKUP_REDIRECT_URI:https://your-domain.com/api/backups/oauth/microsoft/callback
Click to view: Detailed configuration steps with screenshots
🔼 Configure Dropbox
Minimalist Experience: Fast API response, suitable for users seeking maximum speed.
🛠️ Configuration Guide:
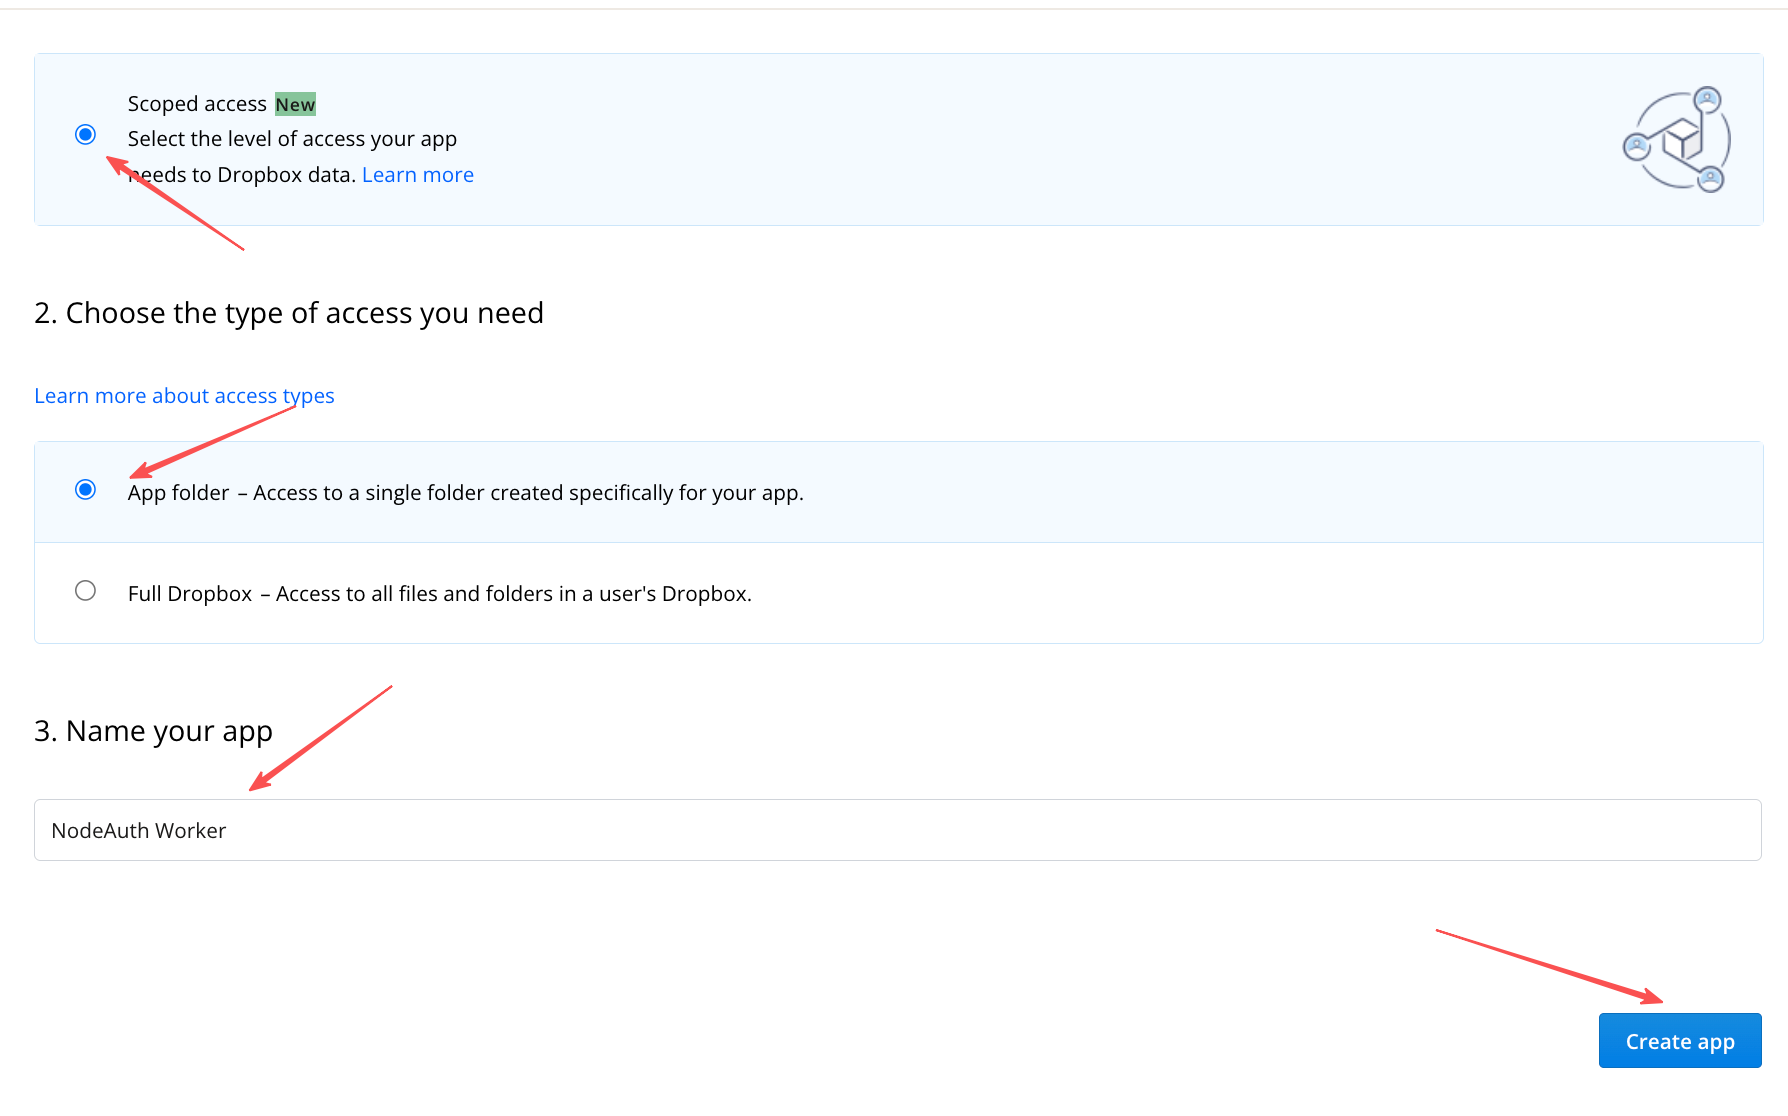
- Visit Dropbox App Console and select
Scoped access->App folder. - Enter in
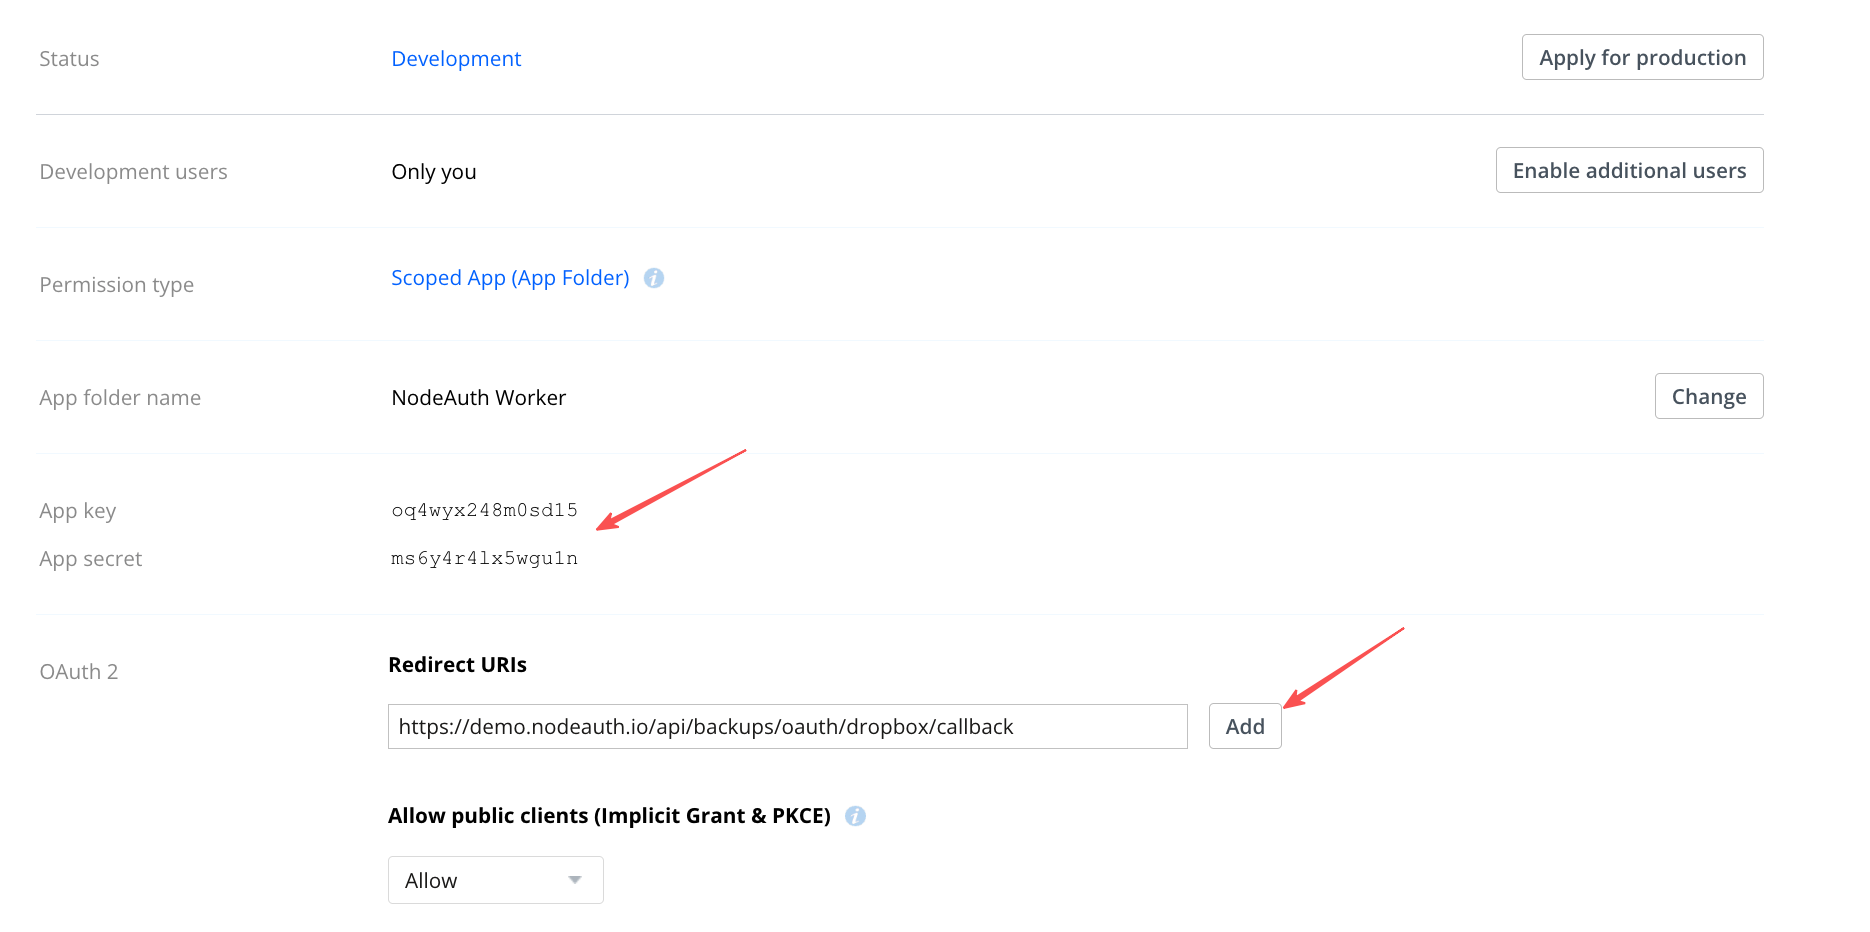
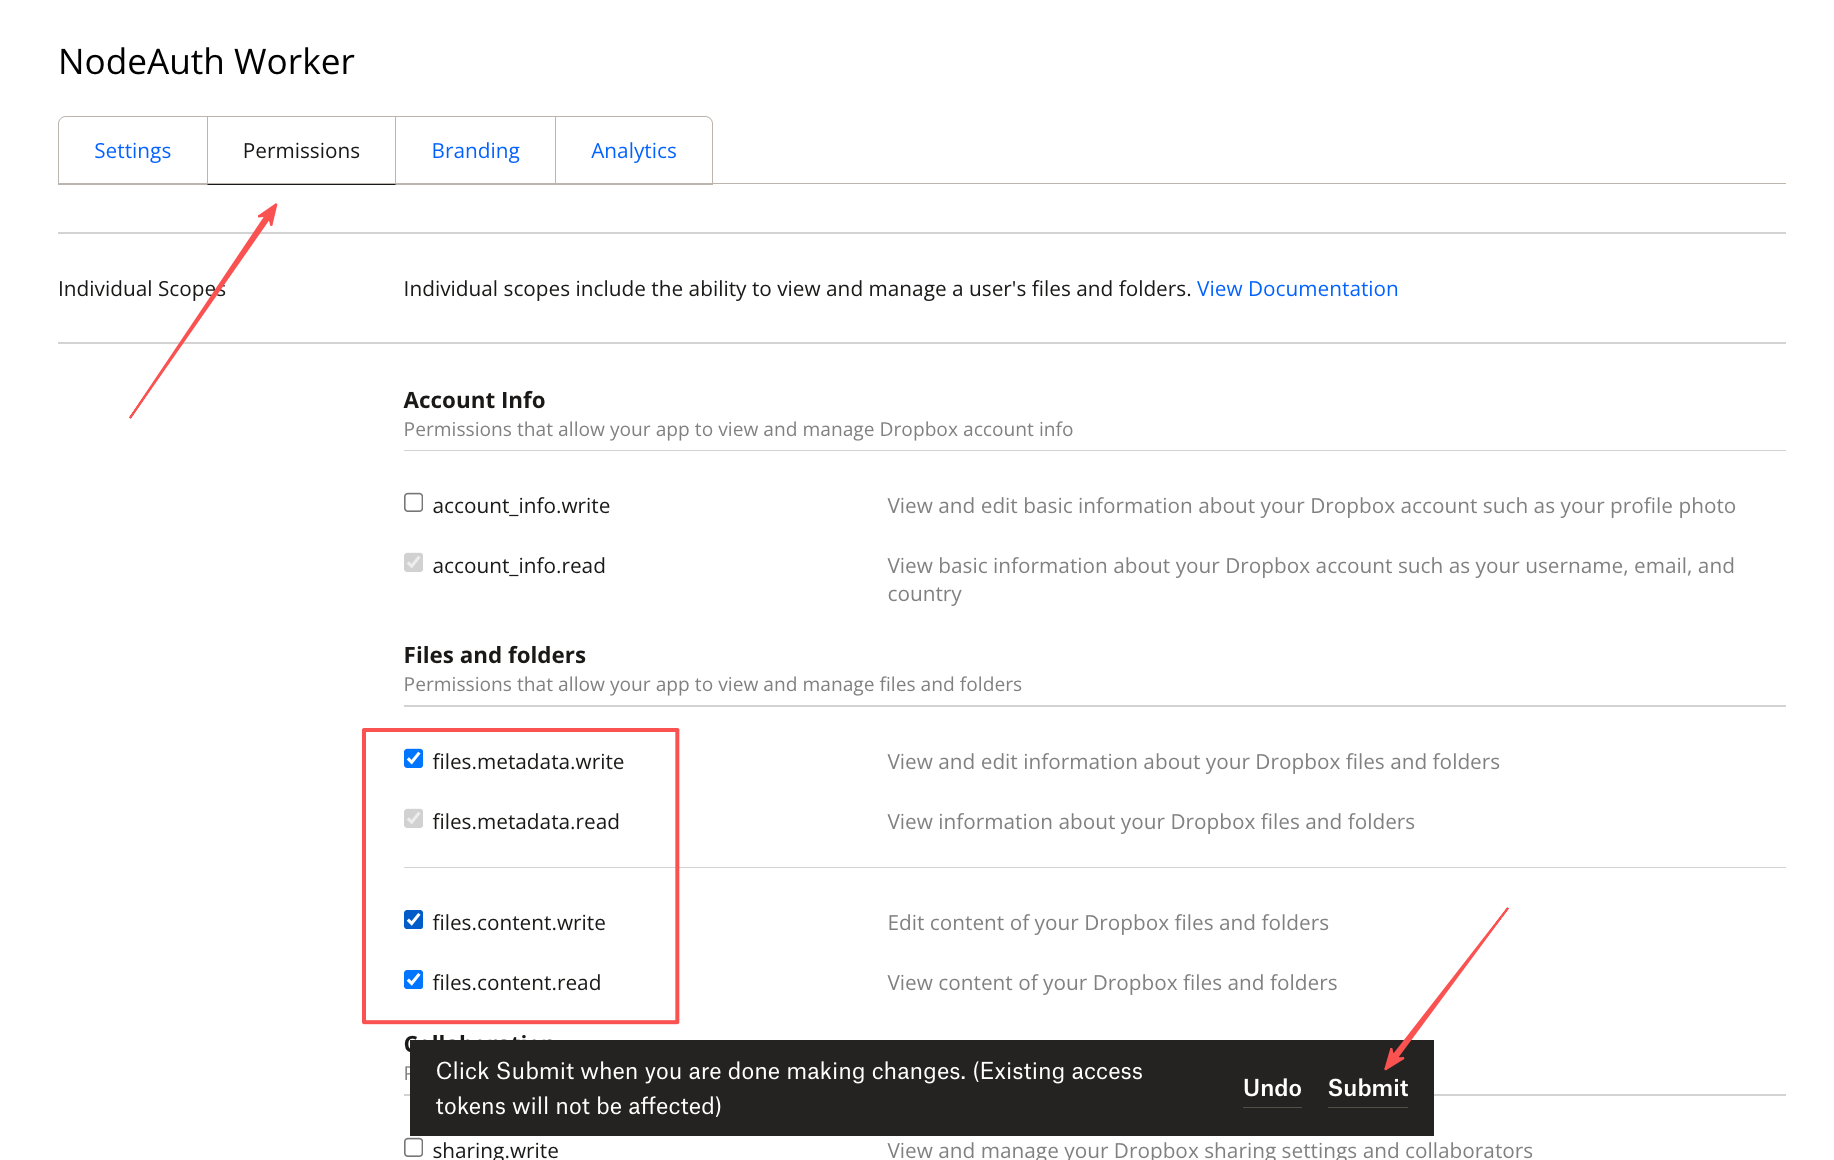
Redirect URIs:https://your-domain.com/api/backups/oauth/dropbox/callback. Permissions勾选files.content.write,files.content.read,files.metadata.read。- Configure Environment Variables: Fill them into your deployment platform's "Environment Variables" or "Secrets" (refer to the Env Guide for details):
OAUTH_DROPBOX_CLIENT_IDOAUTH_DROPBOX_CLIENT_SECRETOAUTH_DROPBOX_BACKUP_REDIRECT_URI:https://your-domain.com/api/backups/oauth/dropbox/callback
Click to view: Detailed configuration steps with screenshots

- Visit Dropbox App Console and select
🔼 Configure Baidu Netdisk
- Domestic Friendly: Specially adapted for users in mainland China, guaranteed by official certification.
- 🛠️ Configuration Guide:
- Visit Baidu Open Platform Console and create a "Hardware/Software Integrated" application.
- Enter the callback address in "Security Settings":
https://your-domain.com/api/backups/oauth/baidu/callback. - Enable "Netdisk Basic Service" permissions.
- Configure Environment Variables: Fill them into your deployment platform's "Environment Variables" or "Secrets" (refer to the Env Guide for details):
OAUTH_BAIDU_CLIENT_IDOAUTH_BAIDU_CLIENT_SECRETOAUTH_BAIDU_BACKUP_REDIRECT_URI:https://your-domain.com/api/backups/oauth/baidu/callback
🔑 Secure OAuth Authorization Flow
- Go to "Data Management" -> "Cloud Backup Settings".
- Select your cloud drive icon and click "Connect XX to Authorize".
- In the official authorization page that pops up, complete the authorization process.
- Token Auto-refresh: As long as the permission is not revoked, the system will automatically sync via the
Refresh Tokenwithout repeating authorization.
🛡️ Backup Strategy & Security Check
- Double Encryption: All backup packages are secondary-encrypted with a "backup decryption password". Even if the cloud drive is compromised, the data remains unreadable.
- Redundancy & Conflict Resolution: Uses
version_timestamplogic to ensure data is not overwritten when multiple devices are writing. - Retention Control: Set the number of recent backups to keep (N); the system will automatically clean up expired copies.
TIP
Off-site Disaster Retrieval: If you download an encrypted backup file from the cloud (like Telegram or S3) but cannot access your NodeAuth instance, refer to the Offline Decryption Guide for instructions on using scripts for offline data extraction.